
Quick Answer
To start yoga at home as a beginner, clear a small space, get a non-slip mat and practice 10 to 20 minutes, two to three times a week. Begin with slow breathing, then six to eight basic poses like Cat-Cow, Child’s Pose and Bridge. End with a short rest. Move gently, never into pain.
Key Takeaways
- Starting yoga at home comes down to seven steps. Each one has its own section later in this guide.
- Starting yoga at home means building a short, regular practice of postures, breathing and relaxation in your own space, at your own pace. You don’t need to be flexible to begin. You need to show up regularly.
- Yoga at home costs almost nothing, fits around your schedule and may help with flexibility, stress, sleep and balance. These benefits are the “why” that keeps beginners coming back.
Starting yoga at home doesn’t require a studio membership, expensive leggings or the ability to touch your toes. If you’re wondering how to start yoga for beginners at home, all it really takes is a mat, a quiet corner and about 15 minutes.
You’d be in good company. About one in six American adults (16.9%) practiced yoga in 2022, according to the CDC’s National Center for Health Statistics. In England, Sport England has reported big gains in fitness activities such as yoga and pilates since its Active Lives survey began in 2015.
Many beginners stall before they start because they worry about getting hurt or don’t know which pose comes first. This guide deals with both. You’ll get a minimal gear list, clear safety rules, a 12-minute starter routine and a 4-week plan you can follow from tomorrow morning.
About this guide: It was prepared by the Inteyoga Editorial Team at Inteyoga (Swami Krishnananda Yoga Vidyapeeth) in Colva, South Goa, India. Inteyoga is registered with Yoga Alliance as a Registered Yoga School (RYS 200, RYS 300 and RYS 500). Health information in this article comes from public sources such as the US National Center for Complementary and Integrative Health (NCCIH), the CDC and the UK’s NHS, linked in the text and listed under Sources. We don’t recommend or sell any products here.
Key takeaways:
- You can start with just a non-slip mat, comfortable clothes and 10 to 15 minutes.
- Short sessions two to three times a week matter more than long, occasional ones.
- Learning alone carries a higher injury risk, so stay with gentle poses and skip headstands, shoulder stands and forceful breathing.
- Research suggests yoga may help with stress, balance and sleep, but it is not a treatment for any condition.
- Check with a doctor first if you are pregnant, over 65 or living with a health condition.
Not sure whether home practice will be enough for your goals? Our yoga FAQ page answers common questions about practice, training and what comes next.
How to Start Yoga for Beginners at Home in 7 Simple Steps
Starting yoga at home comes down to seven steps. Each one has its own section later in this guide.
- Know your “why.” Pick one reason to practice, such as less stress or a looser back. (See benefits.)
- Learn the safety basics. Listen to your body and skip advanced poses at first. (See safety tips.)
- Set up a small space. A mat, a clear patch of floor and a wall nearby are enough. (See gear and setup.)
- Start with your breath. Two minutes of slow belly breathing comes before any pose. (See breathing.)
- Follow one short routine. Use our 12-minute starter routine instead of random videos. (See the step-by-step routine.)
- Repeat it two to three times a week. Build the habit before you add time. (See the 4-week plan.)
- Get feedback when you’re ready. A teacher can spot what a mirror misses. (See going beyond home practice.)
What Does Starting Yoga at Home Really Mean?
Starting yoga at home means building a short, regular practice of postures, breathing and relaxation in your own space, at your own pace. You don’t need to be flexible to begin. You need to show up regularly.
Yoga is an ancient practice rooted in Indian philosophy. The NCCIH notes that yoga in the US usually focuses on three parts:
- Asana: physical postures
- Pranayama: breathing techniques
- Dhyana: meditation
At Inteyoga, we treat yoga as an integrated discipline. It covers the body and breath, but also the mind, your conduct and the small choices you make every day. So your practice isn’t only the 20 minutes on the mat. It’s also how you breathe in traffic, sit at your desk and wind down at night.
What Are the Benefits of Starting Yoga at Home?
Yoga at home costs almost nothing, fits around your schedule and may help with flexibility, stress, sleep and balance. These benefits are the “why” that keeps beginners coming back.
What Are the Practical Benefits of Home Yoga?
Home yoga has no gym or studio fees: no membership, no class packs and no travel. You can practice before work, at lunch or after the kids are in bed. It’s private, which helps if you feel self-conscious in a group class. You set the pace, staying longer in the poses you need and skipping the ones that don’t suit you. And because the sessions are short, they’re easier to turn into a habit.
What Does Research Say Yoga May Help With?
According to the NCCIH, research suggests yoga may:
- Relieve stress. A 2020 review of 12 studies (672 healthy adults) found benefits on perceived stress in every study.
- Improve balance. In a 2014 review, 11 of 15 studies showed improvement in at least one balance measure.
- Support sleep. Studies in groups such as older adults and women with sleep problems reported better sleep.
- Support mental well-being. A 2018 review of 14 studies (1,084 participants) mostly found gains in areas like resilience and general well-being.
- Support healthy habits. A 2018 survey of 1,820 young adults linked regular yoga with better eating and activity habits.
- Ease some pain. Evidence suggests possible relief for neck pain and tension-type headaches, and a small benefit for low-back pain.
Many people also start yoga hoping to become more flexible. Regular, gentle stretching is a reasonable way to work on your range of movement, though progress varies from person to person.
These findings come mostly from structured programs, and results vary. Yoga is not a cure for any condition. It works best as one part of a healthy life, alongside medical care where needed.
In the CDC’s 2022 survey, 80.0% of US adults who practiced yoga said they did it to restore overall health, and 57.4% included meditation as part of their practice.
Who Is Home Yoga Best For?
Home practice works especially well for:
- Office workers: a 10-minute session before the commute can loosen hips and shoulders that sit still all day.
- Parents of young kids: nap time or the half hour after bedtime is often the only quiet window, and it’s enough.
- Shift workers and nurses: studio classes run at fixed times, but your living room is open whenever your shift ends.
- People in small apartments or flats: you only need the length of a mat plus an arm’s reach on each side.
- Anyone nervous about a first class: learning the basics privately can make a studio feel far less intimidating later.
What Are the 8 Rules of Yoga?
The “8 rules of yoga” usually means the eight limbs of yoga set out in the Yoga Sutras, a classical text traditionally attributed to Patanjali. This eight-limbed path is called ashtanga, which literally means “eight limbs.” It maps a path from ethical living to deep meditation, and postures are just one of the eight.
| # | Limb (Sanskrit) | Meaning | How a home beginner can apply it |
|---|---|---|---|
| 1 | Yama | Restraints toward others and yourself | Practice kindly; never punish your body |
| 2 | Niyama | Personal observances | Keep a clean, tidy practice space and a regular routine |
| 3 | Asana | Steady, comfortable posture | Learn a few basic poses well before adding more |
| 4 | Pranayama | Regulation of the breath | Start each session with slow breathing |
| 5 | Pratyahara | Drawing the senses inward | Put the phone away and soften your gaze during rest |
| 6 | Dharana | Concentration | Keep your attention on one point, such as the breath |
| 7 | Dhyana | Meditation | Sit quietly for one or two minutes after your poses |
| 8 | Samadhi | Complete absorption | A long-term goal, not a beginner target |
You don’t have to master all eight to start. But they explain why a good home practice includes breath and stillness as well as stretching.
Also read: What Is Ashtanga Yoga? Meaning, 8 Limbs, Benefits & Practice
What Is the Golden Rule of Yoga?
The golden rule of yoga is to listen to your body: work with effort, never with pain, and respect where your body is today. If a pose causes sharp pain, you’ve gone too far.
The rule comes straight from the first limb above. Ahimsa, or non-harm, is the first of the yamas, and it applies to your own body as much as anyone else’s. In practice:
- Effort is fine. Pain is not. A stretch should feel like mild tension. Sharp, pinching or electric sensations mean stop.
- Never force a pose. Let gravity and time do the work. Bouncing or yanking into a stretch is how strains happen.
- Today’s body sets today’s practice. Some days you’ll go further, some days less. Both count.
What Are the Best Safety Tips for Home Practitioners?
Most healthy beginners can practice yoga at home safely if they choose gentle poses, listen to their body and stop at clear warning signs. With no teacher in the room, you’re your own safety check.
One honest caution first. The NCCIH reports that learning yoga on your own, without supervision, has been linked with a higher risk of injury. It advises new students to avoid extreme practices such as headstands, shoulder stands, the lotus position and forceful breathing. The same source says the most common yoga injuries are sprains and strains, usually in the knee or lower leg, and that serious injuries are rare.
Follow these six rules every time you practice at home:
- Listen to your body and never force a pose. That’s the golden rule above, and it matters most when nobody’s there to stop you.
- Always warm up first. A few minutes of gentle movement prepares your joints and muscles for the poses. Use the 2-3 minute warm-up in the routine below.
- Use support for balance. Do standing and balancing poses next to a wall or a sturdy chair.
- Move slowly in and out of poses. Quick, jerky transitions cause more strain than the poses themselves. When you get up from lying down, roll onto your side first so you don’t feel dizzy.
- Know the stop signs. Stop right away if you feel dizziness, chest pain, numbness or tingling, sharp joint pain or shortness of breath.
- Check your health first. If you’re pregnant, over 65 or managing a health condition, read the doctor section below before your first session.
What Is the Best Way to Learn Yoga for Beginners?
The best way to learn yoga is to mix short, regular home practice with occasional guidance from a qualified teacher. Home practice builds the habit. A teacher checks your form and answers the questions a video can’t.
A simple approach that works:
- Learn the breath first. Slow breathing makes every pose easier and safer.
- Learn a few poses well. Six to eight solid poses beat thirty rushed ones.
- Use beginner-labeled sources. Pick videos, books or apps made for beginners, led by a qualified teacher, with a calm pace and clear spoken cues.
- Check your form. Use a mirror, film yourself on your phone, or book a live class (in person or online) once or twice a month.
- Keep simple notes. Jot down which poses feel hard and take those questions to a teacher.
- Practice at home two to three times a week. Repetition is how the body actually learns.
Skip any video that rushes into advanced poses. A video can’t see you, so it can’t stop you from straining.
Essential Gear & Setup
You don’t need much: a yoga mat and comfortable clothes are enough to start. Blocks, a strap and a blanket help later, and you probably already own swaps for most of them.
What Gear Do You Need for Yoga at Home?
| Item | Do you need it? | Why it helps | Household swap |
|---|---|---|---|
| Non-slip yoga mat | Essential | Grip and joint cushioning | Short term only (see FAQ on practicing without a mat) |
| Comfortable clothing | Essential | Free movement, no tugging | Leggings, joggers, T-shirt |
| Yoga blocks (2) | Very useful | Brings the floor closer in standing poses | Thick hardback books |
| Yoga strap | Useful | Helps when your hands can’t reach | A belt or long scarf |
| Blanket | Very useful | Knee padding and warmth during rest | Folded bath towel |
| Bolster or firm cushion | Optional | Support in restful poses | Two stacked sofa cushions |
| Wall space | Very useful | Balance support and gentle inversions | Any clear wall |
| Water | Recommended | Sip before and after | None needed |
Clothing tip: choose stretchy, breathable clothes that stay put. Loose tops can slide over your face in head-down poses like Downward-Facing Dog.
Footwear tip: go barefoot. Socks slide on most mats and raise the risk of slipping.
How Do You Set Up a Home Yoga Space?
Pick a quiet spot about the length of your mat, plus an arm’s reach on each side, away from furniture and sharp edges. Then run through this checklist:
- Floor: flat and firm. Wood or tile works best under a mat. Thick carpet makes balance harder.
- Space: you can stretch both arms out and up without hitting anything.
- Air: fresh and not too hot. A normal room temperature is safest for beginners.
- Light: natural light if you can. Avoid harsh overhead glare when lying down.
- Sound: phone on silent or in another room. Tell the people you live with you need 20 minutes.
- Wall nearby: handy for balance and for Legs-Up-the-Wall.
- Props within reach: blanket, blocks or books, and a strap or belt.
- Screen placement: if you follow a video, set the screen where you can see it without twisting your neck.
You don’t need a spare room. A bedroom corner or living-room floor is fine. Using the same corner each time simply helps your mind link it with calm focus.
How Long and How Often Should Beginners Practice Yoga at Home?
Most beginners do well with 10 to 20 minutes, two to three times a week, for the first month. After that, add time or days slowly as your body adapts.
Short and regular beats long and rare. Three 15-minute sessions a week build the habit far better than one 90-minute session a month. They also give your muscles and joints time to recover.
| Your starting point | Session length | Sessions per week | When to increase |
|---|---|---|---|
| Brand new to exercise | 10 minutes | 2 | After 2 easy weeks |
| Active, new to yoga | 15-20 minutes | 3 | After 2-3 weeks |
| Busy schedule | 10 minutes | 4-5 short sessions | Add one longer weekend session |
| Main goal is relaxation | 15 minutes | As often as helpful | Add longer rest at the end |
| Over 65 or returning after a break | 10 minutes, gentle | 2 | After checking with your doctor |
Consistency over weeks matters more than intensity on any one day.
What Is the Best Time to Do Yoga?
The best time to do yoga depends on what you want from the session: energy in the morning, a reset at midday or calm in the evening. Each slot has its own feel.
- Morning: wakes up a stiff body and sets a steady tone for the day. You’ll feel tighter at first, so go slowly.
- Midday: a short break from desk work can ease neck and shoulder tension.
- Evening: muscles are usually warmer and more flexible. Choose gentle poses over strong ones.
- Before bed: keep it very soft. Restful poses and slow breathing suit this time best.
Also read: The Simple 10-Minute Morning Yoga Routine For Energy 2026
Which Breathing Practices Should Beginners Learn First?
Start with slow belly breathing and an even, counted breath. Both are gentle, easy to learn and sit underneath every pose you’ll do.
How Do You Practice Belly (Abdominal) Breathing?
- Lie on your back with knees bent, or sit tall.
- Rest one hand on your belly and one on your chest.
- Breathe in slowly through your nose. Let the belly rise first.
- Breathe out slowly through your nose. Let the belly fall.
- Keep going for 1 to 3 minutes.
How Do You Practice an Even, Counted Breath?
Breathe in through the nose for a count of four. Breathe out for a count of four. Keep it smooth and quiet. If four feels long, use three. Over time you can let the out-breath grow a little longer than the in-breath, which many people find calming.
What About Alternate Nostril Breathing?
Gentle alternate nostril breathing, called Nadi Shodhana, can come in during week three or four. Keep it slow and relaxed, and don’t hold the breath at this stage.
Step-by-Step Beginner Routine: Warm-Up, 5 Easy Poses and Cool-Down
This beginner routine has three parts: a 2-3 minute warm-up, five easy poses almost anyone can try, and a cool-down that ends in Savasana. It takes about 12 minutes, so it fits before work or during a lunch break.
| Part | What you do | Time |
|---|---|---|
| 1. Pre-yoga warm-up | Gentle joint and spine movements | 2-3 min |
| 2. Five easy poses | Child’s Pose, Cat-Cow, Downward-Facing Dog, Mountain Pose, Cobra | About 6 min |
| 3. Cool-down and Savasana | Two floor stretches, then rest | About 3 min |
Completely new? In week one, do the warm-up, Child’s Pose, Cat-Cow, Mountain Pose and Savasana. Add Downward-Facing Dog and Cobra in week two (see the 4-week plan below).
Step 1: How Do You Do a Pre-Yoga Warm-Up?
A short warm-up gets your joints moving before you hold any pose. Sit comfortably or stand, and move slowly with your breath:
- Neck half-circles: drop your chin toward your chest and roll your head slowly from shoulder to shoulder, 3 times each way. Don’t roll your head backward.
- Shoulder rolls: roll both shoulders up, back and down 5 times, then reverse.
- Wrist and ankle circles: circle each wrist and ankle 5 times in each direction.
- Seated side bends: reach your right arm overhead and lean gently left for 2 breaths. Switch sides.
- Gentle seated twists: place your right hand on your left knee and turn your chest left for 2 breaths. Switch sides.
Step 2: What Are the 5 Easy Beginner Poses?
1. Child’s Pose (Balasana): For Relaxation
Method:
- Kneel on your mat with your big toes touching and knees hip-width apart.
- Breathe out and sit your hips back toward your heels.
- Fold forward and rest your forehead on the mat or on a block.
- Stretch your arms forward, or rest them by your sides.
- Stay for 5 to 10 slow breaths.
Benefits: gently stretches the back and hips, and many people find it restful. This is your rest pose, so come back to it whenever you need a pause. Put a cushion between hips and heels if they don’t meet.
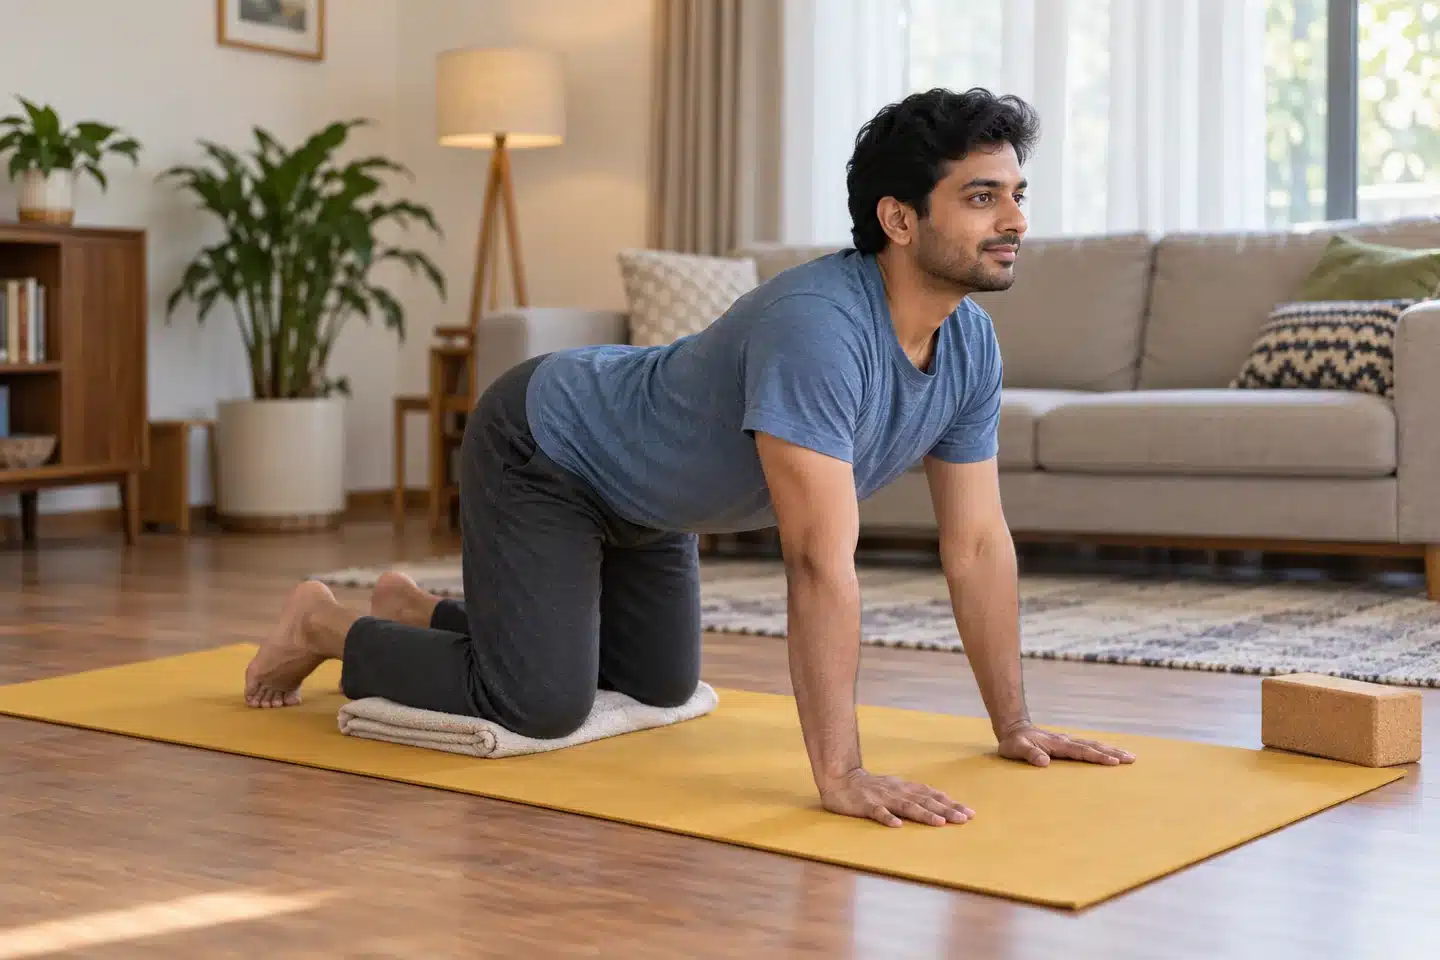
2. Cat-Cow Pose (Marjaryasana-Bitilasana): For Spine Flexibility
Method:
- Come onto hands and knees, wrists under shoulders and knees under hips.
- Breathe in: drop your belly, lift your chest and tailbone, and look slightly forward (Cow).
- Breathe out: round your back toward the ceiling and tuck your chin (Cat).
- Repeat 6 to 10 rounds, letting your breath set the pace.
Benefits: moves the spine forward and back, which many people find eases the stiff feeling of long hours sitting, and teaches you to link breath with movement. Slide a blanket under sore knees.
3. Downward-Facing Dog (Adho Mukha Svanasana): For a Full-Body Stretch
Method:
- From hands and knees, spread your fingers wide and tuck your toes under.
- Breathe out and lift your hips up and back into an upside-down “V”.
- Bend your knees as much as you need. Aim for a long spine, not straight legs.
- Let your head hang between your arms and relax your neck.
- Hold for 3 to 5 breaths, then lower your knees and rest.
Benefits: stretches the backs of the legs, the back and the shoulders at once, and builds upper-body strength.
4. Mountain Pose (Tadasana): For Posture
Method:
- Walk your feet toward your hands and roll up slowly to standing.
- Stand with feet hip-width apart and your weight even across both feet.
- Lengthen your spine, let your shoulders drop away from your ears and let your arms hang.
- Breathe slowly for 5 breaths.
Benefits: teaches upright posture and body awareness. Its alignment is the base of every standing pose.
5. Cobra Pose (Bhujangasana): For Back Strength
Method:
- Come down to the floor and lie on your stomach, legs hip-width apart, tops of the feet on the mat.
- Place your hands under your shoulders, elbows tucked close to your ribs.
- Breathe in and lift your chest just a few inches, using your back muscles more than your arms. This low version is called Baby Cobra.
- Keep your neck long and your lower back comfortable.
- Hold for 3 breaths, lower down as you breathe out, and repeat twice.
Benefits: works the muscles along the back of the spine and gently opens the chest, a useful contrast to hours spent hunched over a laptop or phone. Lift higher only when it feels easy, and never into lower-back pain.
Step 3: How Do You Cool Down and End With Savasana?
Finish every session with a short cool-down and at least 2 minutes in Savasana (Corpse Pose). These quiet minutes let you end the session calmly instead of jumping straight back into your day.
- Knees-to-Chest (Apanasana): roll onto your back and hug both knees gently for 5 breaths.
- Reclined Spinal Twist (Supta Matsyendrasana): lower both knees to one side with your arms out wide for 5 breaths. Switch sides.
- Corpse Pose (Savasana): lie flat, legs relaxed, palms up. Close your eyes and let your breathing return to normal. Rest for at least 2 minutes, or up to 5 if you have time.
Plenty of beginners skip Savasana. Please don’t. Treat those last two minutes as part of the practice.
What Are the 7 Basic Yoga Poses for Beginners?
The 7 basic yoga poses for beginners are Mountain, Cat-Cow, Child’s Pose, Downward-Facing Dog, Warrior II, Bridge and Corpse Pose. Between them, they cover standing, kneeling and lying positions, build leg strength and teach you to relax.
Five of the seven are taught step by step in the routine above. These two add strength for the legs and hips.
Warrior II (Virabhadrasana II)
Step your feet wide apart. Turn your right foot out and bend the right knee over the ankle. Stretch your arms out at shoulder height and look past your right hand. Hold 3 to 5 breaths each side. It builds leg strength and stamina. Shorten your stance if your knee drifts inward.
Bridge Pose (Setu Bandhasana)
Lie on your back, knees bent, feet flat and hip-width apart. Press into your feet and lift your hips. Keep your neck still. Hold for 3 to 5 breaths, lower slowly, and repeat two or three times. It strengthens the glutes and the backs of the legs. For a gentler version, rest a block under your lower back.
Also read: What Is Hatha Yoga? Meaning, 9 Benefits, Poses, How It Works
Recommended Beginner Poses
Once the basics feel familiar, add these four next: Low Lunge, Tree Pose, Seated Forward Bend and Legs-Up-the-Wall. Each has a stable base, adapts easily with props and puts little load on the joints.
1. Low Lunge (Anjaneyasana)
Step one foot forward between your hands and lower the back knee onto a blanket. Keep the front knee over the ankle. Lift your chest and breathe for 5 breaths, then switch sides. It opens the front of the hips, which tighten up from sitting. Use blocks or books under your hands.
2. Tree Pose (Vrksasana)
Stand in Mountain Pose next to a wall. Shift your weight onto your left foot and place the right sole on your inner ankle or calf, never against the side of the knee. Bring your palms together at your chest. Hold 3 to 5 breaths, then switch. It trains balance and focus. Keep a hand on the wall until you feel steady.
3. Seated Forward Bend With Bent Knees (Paschimottanasana)
Sit with your legs out in front, on a folded blanket if your lower back rounds. Bend your knees as much as needed, lengthen your spine, then fold forward from the hips. Hold your shins, or loop a strap around your feet, for 5 breaths. It stretches the whole back of the body without forcing the hamstrings.
4. Legs-Up-the-Wall (Viparita Karani)
Sit sideways next to a wall, then swing your legs up as you lie back. Rest your arms by your sides. Stay for 2 to 5 minutes. It’s a calming, restful pose for the end of a session. Ask your doctor first if you have glaucoma or uncontrolled high blood pressure.
What Are 20 Beginner Yoga Moves?
The 20 beginner yoga moves below include every pose already covered in this guide plus several simple shapes to explore as you progress. Use the table as a quick reference. The “Helpful prop” column shows how to make each one easier at home.
| # | Pose (English) | Sanskrit name | Position | Helpful prop |
|---|---|---|---|---|
| 1 | Mountain Pose | Tadasana | Standing | Wall behind you |
| 2 | Cat-Cow | Marjaryasana-Bitilasana | Kneeling | Blanket under knees |
| 3 | Child’s Pose | Balasana | Kneeling | Cushion under hips |
| 4 | Downward-Facing Dog | Adho Mukha Svanasana | Hands and feet | Blocks under hands |
| 5 | Warrior II | Virabhadrasana II | Standing | Shorter stance |
| 6 | Bridge Pose | Setu Bandhasana | Lying on back | Block under sacrum |
| 7 | Corpse Pose | Savasana | Lying on back | Blanket for warmth |
| 8 | Low Lunge | Anjaneyasana | Kneeling | Blocks or books |
| 9 | Tree Pose | Vrksasana | Standing | Wall for balance |
| 10 | Cobra (Baby Cobra) | Bhujangasana | Lying on stomach | Folded towel under hips |
| 11 | Seated Forward Bend | Paschimottanasana | Seated | Strap and blanket |
| 12 | Legs-Up-the-Wall | Viparita Karani | Lying on back | Wall and blanket |
| 13 | Knees-to-Chest | Apanasana | Lying on back | None needed |
| 14 | Reclined Spinal Twist | Supta Matsyendrasana | Lying on back | Cushion under knees |
| 15 | Easy Seated Pose | Sukhasana | Seated | Cushion under hips |
| 16 | Standing Forward Fold | Uttanasana | Standing | Bend knees, blocks |
| 17 | Chair Pose | Utkatasana | Standing | Back against a wall |
| 18 | Warrior I | Virabhadrasana I | Standing | Hands on hips |
| 19 | Sphinx Pose | Salamba Bhujangasana | Lying on stomach | Forearms on mat |
| 20 | Bound Angle (Butterfly) | Baddha Konasana | Seated | Blocks under knees |
Don’t try all 20 at once. Pick six to eight per session and rotate the rest through the week.
What Are the 12 Basic Asanas?
The 12 basic asanas are a classic sequence from the Sivananda Yoga tradition: Headstand, Shoulderstand, Plough, Fish, Sitting Forward Bend, Cobra, Locust, Bow, Half Spinal Twist, Crow, Standing Forward Bend and Triangle. Practiced in order, they work the whole spine and body.
Not all of them suit a home beginner. Three are inversions the NCCIH specifically advises new students to avoid without supervision.
| # | Asana (Sanskrit) | English name | Safe to start at home? |
|---|---|---|---|
| 1 | Sirsasana | Headstand | No, learn only with a teacher |
| 2 | Sarvangasana | Shoulderstand | No, learn only with a teacher |
| 3 | Halasana | Plough | No, learn only with a teacher |
| 4 | Matsyasana | Fish | With care, using a supported version |
| 5 | Paschimottanasana | Sitting Forward Bend | Yes, with bent knees |
| 6 | Bhujangasana | Cobra | Yes, as Baby Cobra |
| 7 | Salabhasana | Locust | Yes, lifting one leg at a time |
| 8 | Dhanurasana | Bow | Later, once back strength builds |
| 9 | Ardha Matsyendrasana | Half Spinal Twist | Yes, gently |
| 10 | Kakasana | Crow | Later, as an arm-balance challenge |
| 11 | Pada Hastasana | Standing Forward Bend | Yes, with bent knees |
| 12 | Trikonasana | Triangle | Yes, with a block under the hand |
Use this list as a long-term map. According to the Sivananda tradition, practice traditionally begins with Sun Salutations and leg raises and includes relaxation in Savasana. Learn the inversions in person with a teacher.
Which Yoga Poses to Learn First?
Learn Child’s Pose, Cat-Cow and Corpse Pose first, then Mountain Pose. These four teach the skills every other pose relies on: resting, moving with the breath, relaxing fully and standing in good alignment.
Why this order works:
- Child’s Pose comes first because it gives you a safe place to return to when anything feels like too much.
- Cat-Cow comes next because it teaches you to move only as fast as you breathe.
- Corpse Pose follows because relaxing completely is a skill too.
- Mountain Pose closes the set because its alignment carries into every standing pose.
You’re ready to add new poses when you can:
- Hold each of these four for five slow breaths without strain.
- Move in and out of them without holding your breath.
- Get through the session, and the next day, with no joint pain.
The 4-week plan below shows when to bring in the rest.
How to Start Yoga First Time at Home?
For your very first session, keep it to 10 minutes, use only the four “learn first” poses and focus on breathing, not on how far you can stretch. The only goal for day one is to finish feeling better than when you started.
Your first-day plan:
- Pick a time today and block out 15 minutes, including setup.
- Roll out your mat in the space you prepared and keep a blanket nearby.
- Set a gentle timer for 10 minutes so you’re not checking the clock.
- Do the 2-3 minute warm-up from the routine above.
- Move through Child’s Pose, Cat-Cow and Mountain Pose, staying a few breaths in each.
- Finish with three to five minutes of Corpse Pose.
- Write one line in a notebook: how you felt before and after.
Feeling a bit awkward on day one is completely normal. Coordination improves fast with repetition. If you’d like a guided video for your first try, choose one under 15 minutes that’s clearly labeled for complete beginners.
How to Structure Your First Sessions
Build every early session in five parts: settle, warm up, standing poses, floor poses and rest. This order warms the body gradually before it works harder, then gives it time to recover.
| Part | Purpose | Share of session |
|---|---|---|
| 1. Settle | Calm the mind with breathing | About 10% |
| 2. Warm up | Loosen the spine and joints | About 15% |
| 3. Standing poses | Build strength and balance | About 30% |
| 4. Floor poses | Stretch and strengthen gently | About 20% |
| 5. Rest | Let the body absorb the practice | About 25% |
How Do You Grow the Beginner Routine Into a 20-Minute Session?
Once the 12-minute routine feels easy, extend it like this:
| Step | Practice | Time |
|---|---|---|
| 1 | Belly breathing (settle) | 1 min |
| 2 | Pre-yoga warm-up | 3 min |
| 3 | The five easy poses | 5 min |
| 4 | Warrior II, each side | 2 min |
| 5 | Low Lunge, each side | 2 min |
| 6 | Bridge Pose × 3 | 2 min |
| 7 | Cool-down and Savasana | 5 min |
| Total | 20 min |
On calm evenings, swap the Reclined Spinal Twist for 3 minutes of Legs-Up-the-Wall.
What Is a Good 4-Week Plan for Home Yoga?
A good 4-week plan starts with breath and a few poses, then adds one new skill each week. The slow build gives your body time to adapt and makes the habit stick.
| Week | Sessions | Length | Focus | What to add |
|---|---|---|---|---|
| Week 1 | 2-3 | 10 min | Learn to breathe and rest | Belly breathing, warm-up, Child’s Pose, Cat-Cow, Mountain, Savasana |
| Week 2 | 3 | 12-15 min | Complete the beginner routine | Downward-Facing Dog (knees bent), Cobra, cool-down stretches |
| Week 3 | 3 | 15-20 min | Strength and balance | Warrior II, Bridge, Tree Pose, counted breath |
| Week 4 | 3-4 | 20 min | Full session and reflection | Low Lunge, Seated Forward Bend, gentle Nadi Shodhana, full 20-minute session |
At the end of each week, spend two minutes noting:
- Which pose felt easiest, and which felt hardest?
- Did you sleep, focus or feel any different on practice days?
- Any pain? If so, where, and in which pose?
These notes are very useful if you later work with a teacher, because they show your patterns faster than memory can.
What Happens After 30 Days of Yoga?
After 30 days of regular yoga, most beginners move more easily, feel calmer after practice and know the basic poses without checking a video.
After a month of practicing two to four times a week, many beginners notice:
- Smoother movement: Cat-Cow and Downward-Facing Dog feel familiar instead of awkward.
- Better body awareness: you catch tension in your shoulders or jaw sooner during the day.
- A steadier habit: the routine feels like part of your week, not a chore.
- Calmer sessions: your breath slows down more easily as you begin.
Results vary from person to person. Age, starting fitness and consistency all play a part, and most of the progress in strength and flexibility comes after the first month, so keep going.
Which Type of Yoga Is Good for Beginners?
Gentle Hatha yoga is usually the best type of yoga for beginners, with restorative or prop-supported practice as a calm second choice. These styles move slowly, hold poses with care and suit self-guided practice at home.
| Style | Pace | Good for home beginners? | Notes |
|---|---|---|---|
| Hatha | Slow to moderate | Yes, ideal | Builds basics: posture, breath, relaxation |
| Restorative | Very slow | Yes | Long, supported rest poses with props |
| Iyengar-inspired | Slow, precise | Yes, with props | Uses blocks, straps and walls for alignment |
| Yin | Slow, long holds | With care | Avoid pushing deep into joints |
| Vinyasa | Flowing | After a few weeks | Learn the poses first |
| Power or Ashtanga | Fast, strong | Not at first | Better with a teacher once basics are steady |
| Hot (heated room) | Varies | No | NCCIH notes risks of overheating and dehydration |
Also read: What Is Restorative Yoga? 7 Benefits, Poses and How to Start
Can I Lose Belly Fat by Doing Yoga?
You can’t target belly fat with yoga alone, because the body doesn’t burn fat from one chosen spot. But regular yoga, combined with healthy eating and other activity, may help reduce overall body fat, including around the waist.
The evidence so far:
- Overall weight and waist size: a 2022 review of 22 studies (1,178 participants), cited by the NCCIH, found yoga programs for people with overweight or obesity were linked with lower body weight, BMI, body fat and waist size.
- Habits matter: in a 2021 study of 60 women with obesity, yoga’s effect on BMI depended on changes in physical activity and daily fruit and vegetable intake.
- Core work helps posture, not spot fat loss: poses like Bridge and Chair strengthen the trunk muscles, which supports posture, but they don’t burn fat from the belly specifically.
For realistic results, pair yoga with balanced meals, good sleep and regular movement. Talk to your doctor before starting any weight-loss plan, especially if you have a health condition.
Home Yoga vs Studio Classes: Which Is Better for Beginners?
Home yoga wins on convenience, cost and privacy, while studio or live classes win on feedback and correct form. Each fills a gap the other leaves.
| Factor | Home yoga | Studio or live class |
|---|---|---|
| Cost | Very low | Membership or class fees |
| Schedule | Any time | Fixed times |
| Feedback on form | None, unless filmed | Real-time corrections |
| Injury risk for new students | Higher if unsupervised (NCCIH) | Lower with a qualified teacher |
| Privacy | Full | Shared room |
| Motivation | Self-driven | Group energy helps |
| Pace | Your choice | Teacher-led |
| Learning depth | Limited to your sources | Broader, with questions answered |
| Best for | Building a regular habit | Learning correct technique |
What Common Mistakes Should Beginners Avoid?
The most common beginner mistakes are holding the breath, poor posture, comparing yourself to others, doing too much too soon and ignoring how you feel the next day. Each one is easy to fix once you spot it.
- Holding your breath. Beginners often stop breathing in hard poses without noticing. Keep breathing smoothly through the nose. If you can’t, the pose is too intense, so ease off a little.
- Wrong posture. The most common alignment slips are:
- Front knee shooting past the toes in lunges and Warrior poses. Keep the knee stacked over the ankle.
- Rounding the lower back in forward folds. Bend your knees and fold from the hips instead.
- Shoulders creeping up to the ears in Downward-Facing Dog. Draw them gently down your back.
- Locked knees and elbows in standing and weight-bearing poses. Keep a micro-bend.
- Comparing yourself to others. Bodies differ. Your pose doesn’t need to look like anyone’s on Instagram.
- Doing too much too soon. A long first session often ends in soreness, and soreness often ends the habit.
- Ignoring how you feel the next day. Mild muscle tiredness is normal. Joint pain isn’t, and it’s a sign to scale back.
Who Should Talk to a Doctor Before Starting Yoga at Home?
Talk to your doctor first if you’re pregnant, over 65, recovering from an injury or surgery, or living with a health condition. You may need to skip or adjust some poses.
The NCCIH lists several conditions that may call for changes to a yoga practice:
- Knee or hip injuries
- Lumbar spine (lower back) disease
- Severe high blood pressure
- Balance problems
- Glaucoma (avoid head-down positions unless your doctor clears them)
Other points to keep in mind:
- Pregnancy: most pregnant women can stay active with care, but get medical clearance first. The NCCIH advises avoiding hot yoga and long periods lying on your back.
- Older adults: the rate of yoga-related injuries treated in emergency departments is higher in people aged 65 and over. Gentle or chair-based yoga is a safer start.
- Recent surgery or heart conditions: wait for clearance from your care team.
Don’t use yoga to put off seeing a doctor. Yoga can sit alongside medical care, but it doesn’t replace it.
How Do You Stay Consistent With Home Yoga?
Consistency comes from making practice small, scheduled and easy to start. Willpower runs out on busy days, so a simple routine does more of the work than motivation.
- Set a fixed time. Tie it to something you already do, like brushing your teeth or putting the kettle on.
- Keep your mat visible. If it’s rolled out or leaning by the sofa, you’re more likely to use it.
- Use the two-minute rule. On low days, commit to just two minutes of breathing. You’ll often keep going.
- Track your sessions. A tick on a calendar or a habit app builds momentum.
- Rotate your focus. One day for breath, one for strength, one for rest keeps things fresh.
- Practice with someone. A partner, roommate or friend adds gentle accountability.
When Should You Go Beyond Home Practice?
Consider studying with a qualified teacher in a structured program once your home routine feels steady and you want to understand yoga more deeply. A teacher can take you further than videos and books alone.
Signs it may be time:
- You’ve practiced regularly for a few months and want more structure.
- The same pose keeps bothering you.
- You’re curious about pranayama, meditation or yoga philosophy.
- You’ve started thinking about teaching yoga one day.
At Inteyoga, Swami Krishnananda Yoga Vidyapeeth in Colva, South Goa, we teach yoga as a lived discipline that brings together Hatha Yoga, Raja Yoga, Jnana Yoga, and Karma and Bhakti Yoga. Inteyoga is registered with Yoga Alliance as a Registered Yoga School (RYS 200, RYS 300 and RYS 500).
- For growing practitioners: our 200-hour program in Goa is planned for approximately mid-2027. Dates and details will be published once officially announced, and you can join the waitlist on that page.
- For trained teachers: the Advanced TTC 300-Hour Integrated Restorative Yoga (Including Yoga Nidra, Chakra Sadhana, and Prana Vidya Intensive) is a residential, advanced program of 43+2 days. It is taught in English, requires a completed TTC 200 or an equivalent qualification, and is open to applicants aged 21 to 60. It is not a beginner retreat. Eligible teachers can apply through our application form.
The 300-hour program follows our Gift-it-Forward model. No payment is required to apply or to participate. After completing the course, participants may voluntarily support the Gift-it-Forward initiative to help future aspirants, with no obligation.
You can learn more about the founder and principal teacher on our teacher page.
Conclusion: Your First Step Starts Today
Learning how to start yoga for beginners at home comes down to a few simple choices. Clear a small, safe space. Get a non-slip mat. Practice for 10 to 20 minutes, two to three times a week. Warm up, move through five easy poses and always end with Savasana. Follow the 4-week plan, notice how you feel and add time slowly.
Be patient with yourself. Short sessions repeated over several weeks will do more for you than one long, ambitious workout.
When you’re ready to go deeper and study yoga as a complete discipline, we’d love to hear from you. Contact the Inteyoga team with your questions, or message us on WhatsApp at +91 935-473-7240.
Frequently Asked Questions (FAQ)
Can I Do Yoga Without a Mat?
Yes, for a short while. A rug or carpet on a non-slip floor, or a folded blanket for kneeling poses, works for breathing, seated and lying-down practice. Standing poses and Downward-Facing Dog are riskier, because hands and feet can slide on smooth floors. If you plan to practice regularly, a non-slip mat is the one item worth buying.
What Is the Right Time to Do Yoga at Home?
The right time is one you can repeat on most days, because a regular slot builds the habit faster. Most people find it more comfortable to practice on a fairly empty stomach. A common rule of thumb is to wait about two to three hours after a large meal, or an hour after a light snack. Twisting and folding on a full stomach is rarely pleasant.
How Long Does It Take to See Results From Yoga?
Many beginners feel calmer and looser within the first few sessions. Changes in strength, balance and flexibility usually take several weeks of regular practice. Bigger changes take longer: in a 2013 NCCIH-supported review of yoga weight-control programs, the best results came from programs lasting three months or more, with at least three sessions a week and home practice.
Do I Need to Be Flexible to Start Yoga at Home?
No. Flexibility is a result of yoga, not a requirement. Most beginners can’t touch their toes on day one, and that’s completely normal. Bend your knees in forward folds, use blocks or books to bring the floor closer, and use a strap or belt in leg stretches. With regular practice, your range of movement usually improves bit by bit.
Can I Do Yoga at Home Every Day as a Beginner?
Yes, if sessions stay short and gentle. The 12-minute beginner routine in this guide suits most healthy beginners on most days. Avoid repeating the same strong poses daily. Alternate active days with restful ones, and take a break if any joint feels sore or tender.
Is Yoga Enough Exercise on Its Own?
Not always. The CDC in the US and the NHS in the UK both recommend at least 150 minutes of moderate activity a week, plus muscle-strengthening work on two or more days. The NHS lists yoga as a muscle-strengthening activity, so it can cover that part. Most people still need brisk walking, cycling or swimming for the cardio side.
Is Yoga Religious?
Yoga grew out of Indian spiritual and philosophical traditions, and many people practice it as part of a wider spiritual path. But you don’t have to adopt any belief to practice poses, breathing and relaxation at home. People from many faiths, and none, practice yoga. You can explore its philosophy as much or as little as you like.
Do I Need to Meditate or Chant to Do Yoga?
No. You can start with postures and breathing alone. Many beginners later add a minute or two of quiet sitting after their poses, and some go on to explore mantra or chanting. Yoga traditions include these practices, but none of them are required for a safe, useful home practice. Add them only if they feel meaningful to you.