
Quick Answer
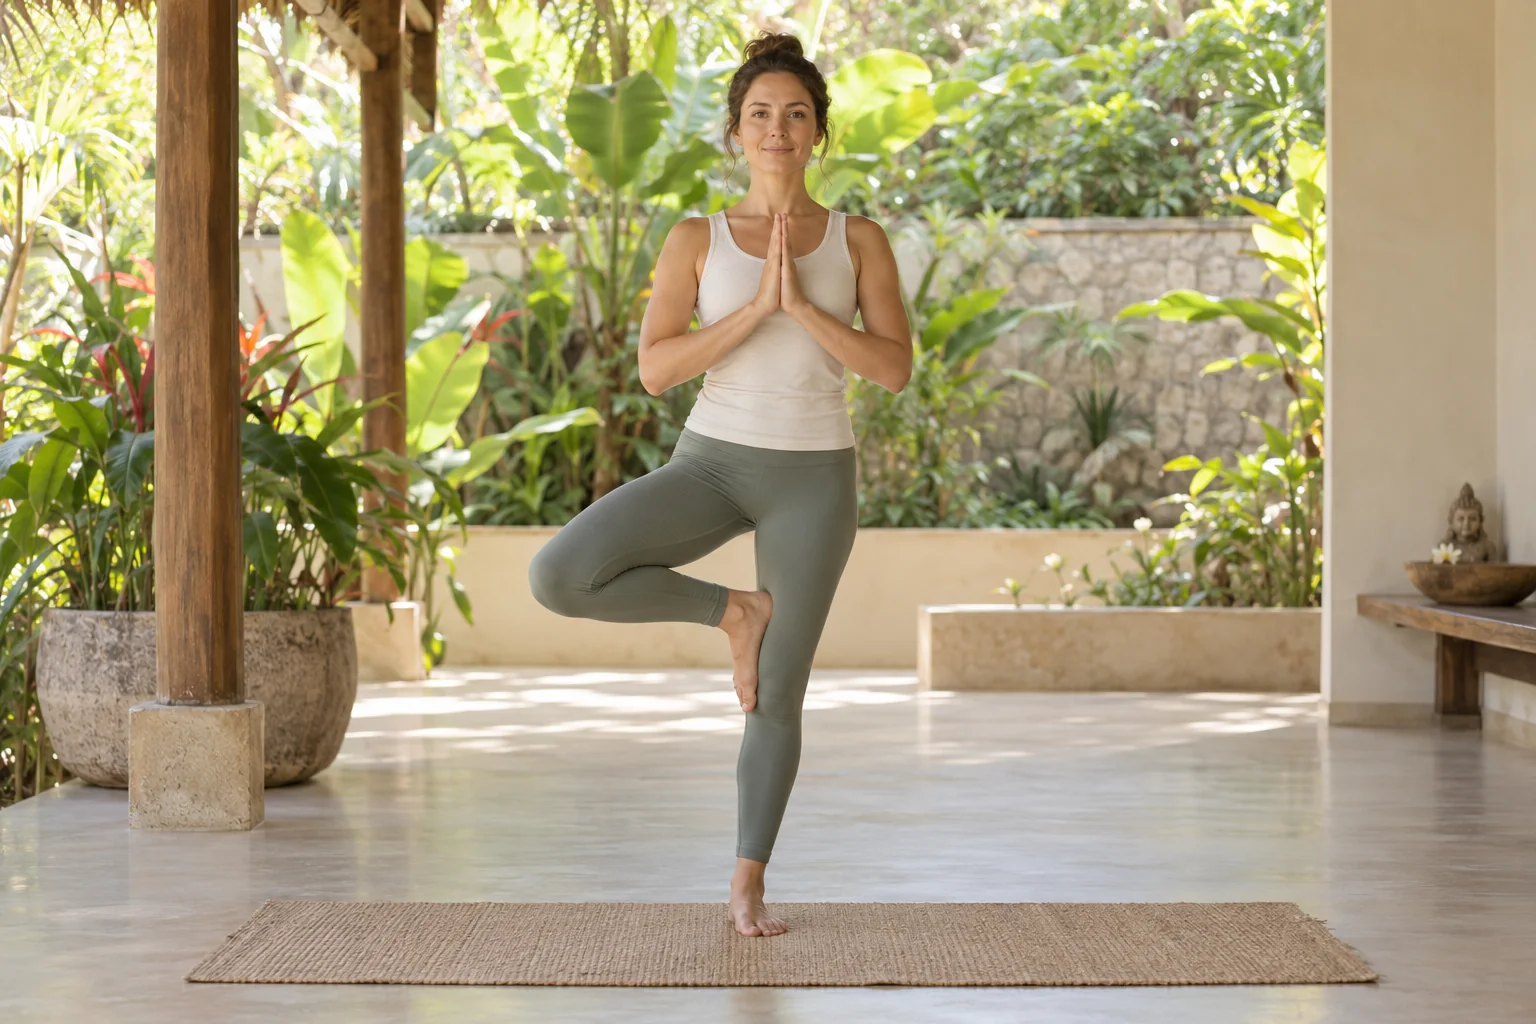
Yoga tree pose (Vrikshasana) is a standing balance pose. You stand on one leg and place the other foot on your inner ankle, calf, or thigh, never on the knee. It builds balance, leg and ankle strength, and focus. Beginners hold it for 15 to 30 seconds per side and build toward one minute.
Key Takeaways
- Yoga tree pose is beginner friendly, and its advanced variations stay challenging for experienced students.
- The one safety rule everyone needs: keep your foot above or below the knee.
- A wall, a counter, or a “kickstand” foot position makes the pose accessible at almost any age.
- Research suggests yoga programs that include balance poses may improve balance and mobility in adults over 60.
- Swaying is normal. Balance in tree pose is active, not frozen.
Can you stand on one leg for 30 seconds without grabbing the wall? Yoga tree pose is one of the simplest ways to find out, and to get better at it.
Try it now next to a kitchen counter. If you wobbled, you’re not alone. Balance is a skill most adults stop practicing after childhood, and it tends to fade quietly until the day you slip on an icy sidewalk or miss a stair.
Yoga tree pose needs no equipment, about two square feet of floor, and a minute of your time. It’s also part of a practice many Americans already use: according to the National Center for Health Statistics, 16.9% of U.S. adults practiced yoga in 2022.
This guide explains how to do yoga tree pose safely, where to put your foot, what research says about balance, how to fix common mistakes, and how to progress. It’s written for first-timers, older adults working on balance, and yoga teachers who want clearer cues.
Already a yoga teacher and thinking about advanced training? Read about our Advanced TTC 300-Hour Integrated Restorative Yoga (Including Yoga Nidra, Chakra Sadhana, and Prana Vidya Intensive) or send us a question on WhatsApp.
Which Yogasana Is Called Tree Pose, and What Are Its Other Names?
The yogasana called tree pose is Vrikshasana (say it: vrik-SHAH-suh-nuh). The name joins two Sanskrit words: vriksha, meaning “tree,” and asana, meaning “posture” or “seat.” You may also see it spelled Vrksasana, Vriksasana, or Vrukshasana.
All four spellings describe the same pose. They’re different English versions of the Sanskrit word वृक्षासन. Some books simply call it “Tree Posture.”
The picture is easy to remember. Your standing leg is the trunk and roots, and your arms are the branches. A tree stays rooted while its branches move in the wind, and in the same way your foot stays grounded while your body makes small corrections.
Which Other Poses Share the Tree Name?
Two naming overlaps confuse students:
- Bikram “Tadasana”: In Bikram and some hot yoga classes, a half-lotus tree is listed as “Tadasana.” Most other styles use Tadasana for Mountain Pose.
- Urdhva Vrikshasana: In Ashtanga yoga’s Sun Salutation A, Urdhva Vrikshasana means standing on both feet with the arms reaching overhead. It isn’t a one-leg balance.
Also read: Ashtanga Vinyasa Yoga Teacher Training: 200 Hour Certificate
What Does Yoga Tree Pose Look Like at a Glance?
| Detail | Yoga Tree Pose |
| Sanskrit name | Vrikshasana (Vrksasana) |
| Pose type | Standing balance, gentle hip opener |
| Level | Beginner, with advanced variations |
| Starting pose | Mountain Pose (Tadasana) |
| Typical hold | 15 to 30 seconds for beginners; 60 seconds or more with practice |
| Gaze (drishti) | One still point in front of you |
| Main muscles used | Standing leg (thigh, glutes, calf, foot), core, hip rotators |
| Helpful props | Wall, chair, kitchen counter, yoga block |
| Space needed | About 2 x 2 feet |
How Do You Do Yoga Tree Pose Step by Step?
To do yoga tree pose, stand in Mountain Pose, shift your weight to one foot, place the other sole on your inner ankle, calf, or thigh (not the knee), press foot and leg together, bring your hands to your chest, and breathe steadily for 15 to 30 seconds. Then switch sides.
Quick steps:
- Stand tall in Mountain Pose.
- Shift your weight into your left foot.
- Place your right sole on your inner ankle, calf, or thigh.
- Press foot and leg gently into each other.
- Level your hips and face forward.
- Bring your palms together at your chest.
- Fix your gaze and breathe for 15 to 30 seconds.
- Lower your foot and repeat on the other side.
Step details:
- Start in Mountain Pose. Stand with your feet hip-width apart or together. Spread your toes and feel your weight across the big toe, little toe, and heel. Let your arms rest and take a few calm breaths.
- Shift your weight. Move your weight into your left foot. Keep a slight softness in the left knee so it doesn’t lock, and press the whole foot into the floor.
- Lift your right foot. Bend your right knee and turn it out to the side. Place the sole on your inner left ankle with toes on the floor (the “kickstand”), your inner calf, or your inner thigh. Keep it off the side of the knee, because the knee bends forward and back and isn’t built to take pressure from the side.
- Press foot and leg together. Push the right sole into your left leg and press the leg back into the foot with equal force. This two-way pressure keeps you stable.
- Level your hips. Face your hips forward and keep them even. Don’t let the standing hip push out to the side.
- Place your hands. Start with palms together at your chest. When you feel steady, raise your arms overhead with palms together or in a wide “V.” Keep your shoulders away from your ears.
- Fix your gaze and breathe. Look at a point that doesn’t move. Breathe slowly through your nose for 15 to 30 seconds.
- Come out slowly. Exhale, lower your arms and foot, and stand in Mountain Pose for a breath. Repeat on the other side.
The Common Yoga Protocol published by India’s Ministry of AYUSH follows the same flow: exhale as you place the foot, inhale as you raise the arms, and hold about 10 to 30 seconds with normal breathing.
Where Should You Place Your Foot in Tree Pose?
Place your lifted foot on your inner ankle, inner calf, or inner thigh, and never on the knee. Beginners should start at the ankle or calf. The thigh position is harder and needs steady balance and reasonably open hips.
| Foot position | Difficulty | Best for | Notes |
| Kickstand (heel on ankle, toes on floor) | Easiest | First-timers, older adults, shaky balance | Toes stay down for support |
| Inner calf | Moderate | Most beginners after a few sessions | Stay clearly below the knee |
| Inner thigh | Harder | Steady balance, open hips | Stay clearly above the knee |
| Half lotus (foot in hip crease) | Advanced | Very open hips, healthy knees | Never force it |
| On the knee | Avoid | No one | Sideways pressure on the knee joint |
A steady tree with the foot at the ankle is better practice than a shaky one at the thigh. Height isn’t the goal. Stability is.
How Should You Breathe and Where Should You Look in Tree Pose?
Breathe slowly through your nose and keep your eyes on one point that doesn’t move. A calm breath keeps your body relaxed, and a fixed gaze gives your brain steady visual information for balance.
Breath. Holding your breath makes the body stiff, and a stiff body tends to wobble more. A slightly longer exhale often helps you settle.
Gaze (drishti). Pick a mark on the wall or a spot on the floor a few feet ahead. Keep your eyes soft rather than strained.
Balance depends on three systems working together: your eyes, your inner ear (the vestibular system), and your body’s sense of position (proprioception). Yoga tree pose asks all three to work at once, which is why it feels so different with your eyes closed.
What Is Tree Pose Good For? Benefits of Yoga Tree Pose
Yoga tree pose is good for practicing balance, working leg and ankle strength, engaging the core, gently opening the hips, and training posture and focus. Because it needs no equipment and little space, it’s one of the easiest balance exercises to do at home or at work.
Benefits at a glance:
- Trains balance and coordination
- Works the standing leg
- Engages the core
- Gently opens the hips
- Supports better posture
- Builds focus and concentration
- Works the feet and ankles
- Builds patience and confidence
How Does Tree Pose Help Balance?
Standing on one leg makes your muscles, joints, eyes, and inner ear work as a team. With regular practice, your body may get better at making small corrections, which can help on uneven ground and stairs.
Does Tree Pose Strengthen Your Legs?
It works them. Your standing leg carries your full weight, so the thigh, glutes, calf, and small foot muscles stay active. Over time, this may contribute to lower-body strength and stability.
Does Tree Pose Work Your Core?
Yes. To stay upright on one leg, your deep core muscles stay switched on, which supports a stable spine and a tall posture.
Is Tree Pose a Hip Opener?
Yes, a gentle one. The lifted leg turns out from the hip and stretches the inner thigh and groin, which can feel good after long hours in a desk chair or car seat.
Can Tree Pose Help Your Posture?
It may. The pose trains a long spine, level hips, and relaxed shoulders, which may help counter the slump that comes with hours at a computer or phone.
Does Tree Pose Help With Focus?
Many practitioners find it does. It’s hard to balance while your mind wanders, so the pose pulls your attention into the present, a little like a standing meditation.
Does Tree Pose Work Your Feet and Ankles?
Yes. Your standing foot adjusts constantly, which works the arch and the small ankle muscles that often get little use in cushioned shoes.
Can Tree Pose Build Confidence?
Wobbling, falling out, and trying again is part of the pose. Staying calm through that process builds patience you can use off the mat, too.
Which Muscles Are Actively Exercised in Tree Pose?
In yoga tree pose, the standing leg does most of the work: the quadriceps, glutes (especially the side-hip muscles), hamstrings, calf, and the foot and ankle muscles. The core keeps the torso steady, and the lifted leg’s hip rotators and inner thigh are worked and gently stretched.
| Body area | Muscles | What they do |
| Standing leg | Quadriceps | Keep the knee steady |
| Standing leg | Gluteus medius and minimus | Keep the pelvis level |
| Standing leg | Hamstrings and calf | Support the knee and ankle |
| Standing foot | Foot and ankle muscles | Make small balance adjustments |
| Lifted leg | Hip external rotators | Turn the knee out |
| Lifted leg | Inner thigh (adductors) | Receive a gentle stretch |
| Torso | Deep core and back muscles | Keep the trunk upright |
| Upper body | Shoulder muscles | Hold the arms overhead |
Is Tree Pose Internal or External Rotation?
The lifted leg turns out at the hip (external rotation), while the standing leg stays neutral with the knee and toes pointing forward. If your standing knee or foot rolls outward, reset the standing foot before you lift again.
How Long Should You Hold a Tree Pose, and How Often?
Hold yoga tree pose for 15 to 30 seconds per side as a beginner and build toward 60 seconds or more. Short, regular practice several times a week is usually more useful than one long session.
| Level | Hold time per side | Rounds |
| Beginner | 15 to 30 seconds | 2 to 3 |
| Regular practitioner | 45 to 60 seconds | 2 |
| Experienced | 60 seconds or more, or add eyes-closed or other variations | 1 to 2 |
Always practice both sides, and give your weaker side the same time or a little more. The Common Yoga Protocol’s 10 to 30 seconds is a sensible starting range.
How Do I Learn Tree Pose as a Beginner?
Start with support, such as a wall or counter, keep your foot low, and add difficulty only when each stage feels steady. There’s no fixed timeline, because balance improves at different rates for different people.
Is There a Simple Beginner Plan to Follow?
This six-week plan is a practical example, not a rule. Move on only when the current stage feels steady.
| Weeks | What to practice | Hold per side |
| 1 to 2 | Kickstand tree at a wall, hands at chest | 15 to 20 seconds |
| 3 to 4 | Foot on inner calf; fingertips only on the wall | 20 to 30 seconds |
| 5 to 6 | Away from the wall; inner thigh if your hips allow | 30 to 45 seconds |
| After that | Arms overhead | Build toward 60 seconds |
How Do You Use a Wall or Counter for Support?
Stand sideways to a wall or kitchen counter and rest one hand on it lightly. As you improve, use only your fingertips, then step slightly away. A counter works well at home, for example while your coffee brews.
Can You Do Tree Pose With a Chair?
Yes. Stand behind a sturdy chair and hold the backrest with one or both hands. It’s a good choice for older adults or anyone rebuilding confidence after an illness or a long break.
What Is the Kickstand Tree?
Keep the toes of your lifted foot on the floor and rest the heel against your inner ankle. This third point of contact makes the pose much easier and is a good starting point for most beginners.
How Can a Yoga Block Help in Tree Pose?
A block gives your lifted foot something to press into. Stand the block next to your standing foot and rest your lifted foot on it, or place it against a wall at shin height. This helps if your foot keeps slipping or your hips feel tight.
Should You Keep Your Hands at Your Chest?
Yes, at first. Raising your arms lifts your center of gravity and makes balancing harder. Keep your palms at your chest until you feel steady.
Is There a Seated Version of Tree Pose?
Yes. Sit near the front of a chair with one foot flat on the floor. Place the other sole against your inner ankle or calf and let the knee open out. You get the hip opening and tall posture without the balance challenge, which makes it easy to do at an office desk.
Can You Practice Tree Pose Lying Down?
Yes. Lie on your back, bend one knee out to the side, and rest the sole against the opposite inner leg. It’s a restful way to learn the hip position before you try it standing.
How Do You Prep for a Tree Pose?
Prep for yoga tree pose by spending three to five minutes waking up your feet, warming your legs, and gently opening your hips. This makes the pose steadier and more comfortable.
- Warm up your feet and ankles. Roll each ankle in circles, spread your toes, and rise onto the balls of your feet a few times.
- Stand in Mountain Pose (Tadasana). Feel your weight spread evenly across both feet.
- Warm up your legs. Hold Chair Pose (Utkatasana) for 3 to 5 breaths, or try Warrior II (Virabhadrasana II).
- Open your hips. Sit in Bound Angle Pose (Baddha Konasana) with soles together and knees open.
- Test your balance. At a wall, lift one foot just off the floor for 10 seconds on each side.
After tree pose, return to Mountain Pose for a breath, then fold forward in Standing Forward Bend (Uttanasana) with soft knees. When you want more challenge, try Eagle Pose (Garudasana) or Warrior III.
What Are Common Mistakes in Tree Pose?
The most common yoga tree pose mistakes are resting the foot on the knee, letting the standing hip jut out, locking the standing knee, and holding the breath. Each one has a quick fix.
| Mistake | Why it matters | How to fix it |
| Foot on the knee | Sideways pressure on the knee | Move foot to ankle, calf, or above the knee |
| Standing hip pushing out | Strains the hip, breaks alignment | Draw the hip toward the midline |
| Locked standing knee | Can overload the knee | Keep a tiny bend; firm the thigh |
| Foot slipping down | Makes the pose unstable | Press foot and leg together; use bare skin |
| Holding the breath | Adds tension and wobbling | Slow nose breathing |
| Shoulders up by the ears | Neck and shoulder tension | Lower arms to a “V” or the chest |
| Moving eyes | Less balance input | Fix your gaze on one point |
| Forcing the knee back | Strains the hip or knee | Open only as far as comfortable |
| Leaning sideways | Breaks the tall line | Stack shoulders over hips |
One cue fixes many of these: imagine a string pulling the top of your head toward the ceiling while your standing foot roots into the floor.
Why Is Tree Pose So Hard?
Yoga tree pose is hard because you balance your full weight on a small base, and your eyes, inner ear, and muscles all have to coordinate at once. Many adults also get little balance practice in daily life.
- Small base: One foot gives far less support than two, so every small shift needs a correction.
- Three balance systems: If your eyes, inner ear, or body awareness is distracted, you wobble.
- Modern habits: Flat floors, supportive shoes, and long hours of sitting leave foot and ankle muscles underused.
- Tight hips: If your hips don’t turn out easily, the lifted foot slips or the knee drifts forward.
- A busy mind: A wandering mind or a held breath shows up quickly as wobbling.
- Tiredness and stress: Balance often feels weaker when you’re tired, hungry, or stressed.
Balance is a skill you can practice. Short, regular sessions usually do more than occasional long ones.
How Do You Build a Balanced Tree in Yoga?
A balanced tree in yoga comes from a firm standing foot, steady pressure between foot and leg, level hips, a fixed gaze, and slow breathing. It isn’t frozen. It stays calm while the body makes small corrections.
- Spread your standing foot and press evenly through the big toe, little toe, and heel.
- Use the two-way press between foot and leg.
- Engage your standing thigh without locking the knee.
- Keep your hips level, as if balancing a bowl of water on your pelvis.
- Fix your gaze on one point.
- Breathe low and slow.
- Start low, then grow: foot low and hands at the chest until you’re steady.
- Practice both sides equally.
- Accept the sway. Small movements mean your balance system is working.
Where Can You Fit Tree Pose Into Your Day?
You don’t need a yoga class to practice. Try a kickstand tree while holding the bathroom counter as you brush your teeth, at a standing desk between meetings, or during a commercial break. If you run or hike, a minute of single-leg balance on each side gives your feet and ankles extra work.
What Is a Good 10-Minute Tree Pose Routine for Beginners?
A good beginner routine combines foot warm-ups, leg activation, supported tree pose on both sides, and a short rest. Try it three or four times a week with a wall or chair nearby.
- Mountain Pose, 1 minute: stand tall and breathe slowly.
- Ankle circles and foot rolls, 1 minute: hold a wall if needed.
- Chair Pose, 3 breaths, 2 rounds: warm up the legs.
- Kickstand tree, 20 seconds each side: hands at the chest.
- Calf tree, 20 to 30 seconds each side: when you’re ready.
- Mountain Pose, 30 seconds: notice any changes.
- Tree with arms overhead, 20 to 30 seconds each side: only if earlier rounds felt steady.
- Standing Forward Bend, 5 breaths: soft knees, relaxed neck.
- Seated rest, 1 to 2 minutes: let your breath settle.
Add a few seconds to each hold when the current time feels easy.
Is There a Printable Tree Pose Checklist?
Use this checklist before each round:
- Standing foot spread and pressing evenly
- Lifted foot above or below the knee, never on it
- Foot and leg pressing into each other
- Hips level and facing forward
- Standing knee soft, not locked
- Shoulders relaxed
- Gaze fixed on one point
- Slow, steady nose breathing
- Both sides practiced for the same time
Want to study yoga in a structured course? Our 200-hour yoga teacher training in Goa is planned for approximately mid-2027. Final dates will be announced on that page.
Who Should Not Do Tree Pose?
People with a recent ankle, knee, or hip injury, dizziness or vertigo, low blood pressure, or a history of falls should not do the full standing tree pose without advice from a doctor or physical therapist. Many of them can still practice a supported, seated, or lying-down version.
Get advice first, or take extra care, if you have:
- a recent or ongoing ankle, knee, or hip injury
- dizziness, vertigo, or an inner ear problem
- low blood pressure or a tendency to feel lightheaded
- a history of falls or a balance disorder
- recent surgery on the legs, hips, or spine
- a headache or poor sleep on the day of practice
- high blood pressure (keep your arms at the chest and avoid straining)
Pregnancy: Balance can change as pregnancy progresses. Check with your OB-GYN or midwife and practice next to a wall or chair.
Older adults: Always practice next to a wall, counter, or chair, especially at the start.
Stop right away if you feel sharp pain, numbness, dizziness, or any knee pain.
What Does the Research Say About Yoga Tree Pose?
Research on yoga programs that include balance poses like tree pose suggests they may improve balance and mobility, especially in older adults. The evidence is promising but still developing, and most studies test full yoga programs rather than tree pose on its own.
Why Does Balance Matter in the U.S.?
According to the CDC, falls are the leading cause of injury for adults 65 and older, and over 14 million older adults, about 1 in 4, report falling each year. CDC fall-prevention materials encourage older adults to stay active with exercises that build strength and balance.
What Have Studies Found About Yoga and Balance?
A 2016 systematic review and meta-analysis in Age and Ageing studied yoga-based exercise in people aged 60 and over. It found a small positive effect on balance and a medium positive effect on physical mobility. Mountain pose, the warrior poses, and tree pose were common in the programs reviewed. The authors said more research is needed to know whether these gains reduce falls.
Later reviews show mixed results. Some report benefits for mobility and leg strength, while others find smaller or unclear effects on static balance. More high-quality research is needed.
Can You Pass the 10-Second One-Leg Balance Test?
A 2022 study in the British Journal of Sports Medicine followed 1,702 adults aged 51 to 75 in Brazil for about seven years. People who couldn’t stand on one leg for 10 seconds without support had an 84% higher risk of death from any cause during the study, after the researchers adjusted for age, sex, body mass index, and health conditions.
This is an observed association, not proof of cause and effect. It doesn’t show that yoga tree pose will help anyone live longer. It does show why balance deserves attention as you age.
To try the check safely, stand next to a wall or counter, rest one foot against the back of your other lower leg, and see if you can hold for 10 seconds. If you can’t, talk to your doctor or a physical therapist and start with the supported options in this guide.
How Many Americans Practice Yoga?
According to NCHS data from the 2022 National Health Interview Survey, 16.9% of U.S. adults practiced yoga. Use drops with age: 21.3% of adults aged 18 to 44 practiced yoga, compared with 8.0% of adults 65 and older. That’s worth noting, because older adults are the group for whom balance training matters most.
What this means for you: Yoga tree pose is one useful part of a balanced movement routine. It isn’t a treatment for any condition. If you have a balance disorder or have fallen recently, see a doctor or physical therapist first.
Also read: 500 Hour Yoga Teacher Training In Goa: A Complete 2026 Guide
Yoga Tree Pose vs Mountain Pose: What Is the Difference?
Mountain Pose (Tadasana) is a standing pose on both feet that sets up posture and alignment. Yoga tree pose starts from Mountain Pose and adds a one-leg balance with the other foot on the inner leg, which makes it harder and adds a gentle hip opening.
| Feature | Mountain Pose (Tadasana) | Yoga Tree Pose (Vrikshasana) |
| Base of support | Both feet | One foot |
| Main focus | Posture, alignment, grounding | Balance, leg work, focus |
| Difficulty | Easiest standing pose | Beginner balance pose |
| Hip opening | None | Gentle, in the lifted leg |
| Typical hold | 30 to 60 seconds | 15 to 60 seconds per side |
| Best used for | Starting and ending standing practice | Practicing balance and concentration |
| Relationship | Foundation pose | Built from Mountain Pose |
Practice them together: a steady Mountain Pose makes for a steadier tree.
How Does Tree Pose Compare With Other Balance Poses?
| Pose | Typical level | Main challenge | Good next step after tree? |
| Tree Pose (Vrikshasana) | Beginner | One-leg stability | Starting point |
| Eagle Pose (Garudasana) | Intermediate | Wrapped limbs, bent standing knee | Yes |
| Warrior III (Virabhadrasana III) | Intermediate | Body parallel to the floor | Yes |
| Dancer Pose (Natarajasana) | Intermediate to advanced | Backbend while balancing | After Eagle and Warrior III |
| Half Moon Pose (Ardha Chandrasana) | Intermediate | Side-facing balance with a hand down | Yes, with a block |
These levels are common teaching conventions, not official ratings. Different teachers may order them differently.
What Are the Advanced Tree Pose Variations?
Advanced tree pose variations include arms in a “V,” swaying tree, side-bending tree, eyes-closed tree, and half lotus tree. Try them only after you can hold a steady basic tree for about 60 seconds on each side.
- Arms in a “V”: often easier on tight shoulders than palms together.
- Swaying tree: lean gently side to side with arms overhead.
- Side-bending tree: bend toward the standing-leg side with both sides of the waist long.
- Eyes-closed tree: makes your inner ear and body awareness work harder. Stay near a wall.
- Half lotus tree (Ardha Padma Vrikshasana): foot in the hip crease, sole up. Only with very open hips and healthy knees.
- Bound half lotus tree: reach the same-side arm behind your back to hold the foot.
- Tree on a soft surface: a folded mat makes your foot work harder.
- Partner tree: stand side by side, inner arms linked, outer legs in tree.
Never force the half lotus. If your knee complains, go back to the thigh position.
How Is Bikram Yoga Tree Pose Different?
Bikram yoga tree pose places the lifted foot in half lotus with the hands in prayer at the chest, and it’s practiced in a heated room as part of a fixed 26-posture sequence. Most other styles use a lower foot position and allow the arms overhead.
In the Bikram sequence, the pose is listed as “Tadasana” and is followed by Toe Stand, where the standing leg bends into a balanced squat.
| Feature | Classic Tree Pose | Bikram Tree Pose |
| Lifted foot | Ankle, calf, or inner thigh | Half lotus on the opposite thigh |
| Hands | Chest or overhead | Chest, in prayer |
| Room | Any temperature | Heated room |
| Beginner friendly | Easy to adapt | Harder; needs open hips |
Half lotus can place more rotational stress on the knee. Use it only if your hips open easily and your knees are pain free. In a heated room, drink enough water and stop if you feel dizzy.
What Is Aerial Yoga Tree Pose?
Aerial yoga tree pose uses a fabric hammock hung from the ceiling, either as light support for a standing tree or as an upside-down variation in advanced classes. Learn it only from a trained aerial yoga teacher.
Supported standing tree: You hold the hammock or lean your lower back into it, so you can focus on alignment with less fear of falling.
Inverted tree: You hang upside down with the hammock supporting your hips or legs and one leg in the tree shape. This is an inversion, not a balance pose.
Inverted versions are often not advised for people with high blood pressure, glaucoma, heart conditions, a recent head or neck injury, or vertigo, or during pregnancy. Ask your doctor first if any of these apply, and master the floor version before you try it in the air.
Where Does Tree Pose Come From?
Tree pose is one of the few standing poses described in older Hatha yoga texts. The Gheranda Samhita lists Vrikshasana among its 32 asanas (Chapter 2, verse 36). Scholars usually date the text to the late 17th or 18th century, though exact dating is uncertain.
The text describes placing the right foot at the top of the left thigh and standing on the ground like a tree. Some yoga writers point to a 7th-century stone carving at Mamallapuram in southern India, which shows a figure standing on one leg, as a possible earlier example. That link is suggestive rather than proven.
Today, Vrikshasana appears in the Common Yoga Protocol from India’s Ministry of AYUSH, and it’s widely taught in American studios, gyms, and physical therapy settings.
Also read: Best Yoga Classes in Goa: Honest 2026 Guide to Drop-ins & TTC
What Is the Spiritual Meaning of the Tree Pose in Yoga?
The spiritual meaning of tree pose is usually described as staying rooted while growing upward. The grounded foot stands for stability, and the raised arms stand for growth and openness. These are traditional and symbolic readings rather than scientific claims.
- Rootedness: staying steady when life feels uncertain.
- Growth: reaching upward like branches toward light.
- Steadiness with ease: Patanjali’s Yoga Sutras (2.46) describe asana as sthira sukham asanam, a posture that is steady and comfortable. Tree pose asks for firm legs and an easy breath at the same time.
- Calm in motion: a tree sways without falling, which many students take as a lesson in staying centered.
- Discipline (tapas): Indian traditions describe ascetics standing on one leg as a form of disciplined practice.
The meaning is personal. Some students treat tree pose as a balance exercise; others use it as a standing meditation.
How Should Yoga Teachers Cue Tree Pose?
Show all foot options before anyone lifts a foot, use short and clear cues, watch for the jutting hip and the foot on the knee, and remind students that wobbling is normal.
Cues that work well for many students:
- “Root down through your standing foot.”
- “Press foot and leg into each other.”
- “Keep your foot off the knee.”
- “Hips level, facing forward.”
- “Soft gaze on one still point.”
- “Wobbling is part of the pose.”
Set up the class near a wall when you can, and offer chairs to older students.
Is a Yoga Teacher the Same as a Yoga Therapist?
No. A yoga teacher guides safe general practice; a yoga therapist works with health conditions in a clinical or therapeutic context. The International Association of Yoga Therapists (IAYT) sets its own standards for yoga therapy training, which are much longer than a standard 200-hour or 300-hour teacher training. A teacher training certificate doesn’t qualify someone to treat medical conditions, so refer students with injuries or health conditions to a doctor or physical therapist.
Also read: Best Yoga Teacher Training Abroad: How to Verify a School in 2026
What Is the Mother of All Yoga Poses, and Which Asana Is the Queen?
Sarvangasana (Shoulder Stand) is widely called the queen, and sometimes the mother, of asanas, while Sirsasana (Headstand) is called the king. Tadasana (Mountain Pose) is often called the foundation or mother of standing poses. These are traditional titles, not official rankings.
These titles are often traced to B.K.S. Iyengar’s teaching in Light on Yoga. Both inversions are advanced and should be learned only with a qualified teacher. People with neck problems, high blood pressure, glaucoma, or heart conditions, and those who are pregnant, are often advised to avoid or modify them.
Tree pose starts and ends in Tadasana, so a good Mountain Pose makes a better tree.
What’s the Hardest Pose in Yoga?
There’s no single hardest yoga pose, because difficulty depends on your strength, flexibility, and experience. Poses often named among the hardest include Scorpion Pose, Peacock Pose, Formidable Face Pose, Eight-Angle Pose, and Handstand.
- Scorpion Pose (Vrischikasana): a forearm or hand balance with a deep backbend.
- Peacock Pose (Mayurasana): the body balanced horizontally on the hands.
- Formidable Face Pose (Gandha Bherundasana): an extreme backbend with the legs over the head.
- Eight-Angle Pose (Astavakrasana): an arm balance needing strength and hip mobility.
- Handstand (Adho Mukha Vrksasana): its Sanskrit name means “downward-facing tree.”
Tree pose is often the first balance pose students learn, and it builds the attention that harder balances need.
What Are the 7 Poses of Yoga?
Yoga has no official list of seven poses. A common beginner set is Mountain Pose, Tree Pose, Downward-Facing Dog, Warrior II, Cobra Pose, Child’s Pose, and Corpse Pose, which together cover standing, balancing, stretching, backbending, resting, and relaxing.
| Pose | What it mainly trains |
| Mountain Pose (Tadasana) | Posture and body awareness |
| Tree Pose (Vrikshasana) | Balance and focus |
| Downward-Facing Dog (Adho Mukha Svanasana) | Leg stretch, arm strength |
| Warrior II (Virabhadrasana II) | Leg strength, hip opening |
| Cobra Pose (Bhujangasana) | Gentle backbend |
| Child’s Pose (Balasana) | Rest for the back and hips |
| Corpse Pose (Shavasana) | Deep relaxation |
The Common Yoga Protocol uses a similar mix of standing, sitting, prone, and supine postures, with Vrikshasana among its standing poses.
Which Yoga Pose Has the Most Benefits?
No single yoga pose has the most benefits for everyone. Surya Namaskar (Sun Salutation) is often named because it’s a full sequence that moves the whole body, but the right choice depends on your goals, age, and health.
- Surya Namaskar: forward bends, a backbend, and strength work linked with breath.
- Tadasana: trains posture and body awareness.
- Yoga tree pose: stands out for balance, leg work, and focus, and almost anyone can do some version of it.
- Shavasana: may support relaxation at the end of practice.
A balanced routine usually serves people better than any single pose. Mix standing, balancing, stretching, strengthening, breathing, and relaxation, and practice regularly and safely.
What Is a Cleopatra Pose?
“Cleopatra pose” is an informal name, not a classical yoga asana. On social media it usually means a relaxed side-lying position with the head resting on one hand. The closest traditional yoga posture is Anantasana (Side-Reclining Leg Lift, sometimes called Vishnu’s Couch Pose).
You won’t find Cleopatra pose in the Gheranda Samhita or the Hatha Yoga Pradipika. In Anantasana, you lie on your side, rest your head on your hand, and lift the top leg, which stretches the inner thigh and hamstrings. Like tree pose, it asks you to balance on a small base, only lying down instead of standing.
What Is the Bottom Line on Yoga Tree Pose?
Yoga tree pose teaches something simple: stability doesn’t mean standing still. It means staying rooted while you make small, calm corrections. Start low, use a wall or counter when you need it, keep your foot off the knee, and breathe. Practiced for a minute or two several times a week, yoga tree pose is an easy, low-risk way to give balance the regular attention it deserves.
Where Can You Study Tree Pose and Advanced Teaching in Goa?
If you already teach or have completed a 200-hour training, Swami Krishnananda Yoga Vidyapeeth and Inteyoga in Colva, South Goa, offer the Advanced TTC 300-Hour Integrated Restorative Yoga (Including Yoga Nidra, Chakra Sadhana, and Prana Vidya Intensive). It’s an advanced yoga teacher training program, not a beginner yoga retreat.
| Detail | Advanced TTC 300-Hour Integrated Restorative Yoga (Including Yoga Nidra, Chakra Sadhana, and Prana Vidya Intensive) |
| Format | Residential, taught in English |
| Duration | 43+2 days (43 training days plus one arrival day and one departure day) |
| Eligibility | Completed TTC 200 or an equivalent yoga teacher training qualification |
| Age | 18 to 59 at application (21+ recommended; 18 to 20 considered case by case) |
| School status | Inteyoga is registered with Yoga Alliance as a Registered Yoga School (RYS 200, RYS 300, RYS 500) |
| Cost model | Gift-it-Forward: no payment is required to apply or to participate |
Confirmed batches:
- December 13, 2026 to January 26, 2027
- February 5, 2027 to March 21, 2027
- May 24, 2027 to July 7, 2027
- July 16, 2027 to August 29, 2027
- September 7, 2027 to October 21, 2027
- November 1, 2027 to December 15, 2027
About Gift-it-Forward: There is no payment required to apply and no payment required to participate. After completing the program, participants may voluntarily support the Gift-it-Forward initiative to help future aspirants. There is no obligation to contribute.
For U.S. and other international participants: The program is a short-term yoga program for personal growth and deeper yogic study, lasting 45 days in total. Participants receive a participation or completion certificate, not an academic degree, diploma, or government-recognized professional qualification. International participants use the Indian e-Tourist Visa route, subject to nationality-specific eligibility and current Government of India rules. Check the official Indian e-Visa website before you apply.
Next steps: See the full 300-hour program details, read our FAQ, or register through our booking page. You can also WhatsApp us at +91 935-473-7240.
Who Prepared This Guide, and How Was It Checked?
This guide was prepared by the Inteyoga Editorial Team at Swami Krishnananda Yoga Vidyapeeth and Inteyoga, managed by Inteyoga Shala LLP, Plot No. 6, Novo Vaddo, Sernabatim, Colva, Salcete, Goa 403708, India. Inteyoga is registered with Yoga Alliance as a Registered Yoga School (RYS 200, RYS 300, RYS 500).
Our Founder-Director, Dr. Ashutosh, holds an MBBS, an M.Sc. in Yoga, and Yoga Master Level 6 certification from the Yoga Certification Board, Ministry of AYUSH, Government of India. You can read more about him on our Teacher page.
How we checked this guide:
- We compared the pose instructions with a traditional Hatha yoga text (the Gheranda Samhita) and the Ministry of AYUSH Common Yoga Protocol.
- We based health statements on peer-reviewed research and U.S. government data from the CDC and NCHS, and we describe the limits of that evidence.
- We checked visa information against official Government of India sources.
- We used cautious wording for health topics. Yoga may support wellbeing, but it isn’t a medical treatment.
Contact: info@inteyoga.org | WhatsApp +91 935-473-7240
Frequently Asked Questions About Yoga Tree Pose (FAQ)
Why Should the Foot Not Go on the Knee in Tree Pose?
The knee is a hinge joint. It bends forward and backward, but it isn’t built to take pressure from the side. When you press your foot into the side of the knee, you push the joint in a direction it doesn’t naturally move, which can strain it over time. Place your foot on the inner ankle, the inner calf below the knee, or the inner thigh above the knee instead.
Can Older Adults Do Tree Pose?
Why Should the Foot Not Go on the Knee in Tree Pose?
The knee is a hinge joint. It bends forward and backward, but it isn’t built to take pressure from the side. When you press your foot into the side of the knee, you push the joint in a direction it doesn’t naturally move, which can strain it over time. Place your foot on the inner ankle, the inner calf below the knee, or the inner thigh above the knee instead.
Is Tree Pose Safe During Pregnancy?
Many people practice a supported version of tree pose during pregnancy, using a wall or chair for balance. Because your body and center of gravity change as pregnancy progresses, balance may feel different from week to week. Talk to your OB-GYN or midwife before you start, keep your foot low, and practice with a qualified prenatal yoga teacher if possible. Stop if you feel dizzy or uncomfortable.
Can I Do Tree Pose Every Day?
Most healthy people can practice tree pose daily. It’s low impact and takes only a minute or two, so it fits easily into a morning routine or a work break. Avoid practicing on a very full stomach or when you feel dizzy or very tired. If you notice pain in your ankle, knee, or hip, stop and rest, and see a health professional if the pain continues.
Should I Do Tree Pose Barefoot or in Shoes?
Barefoot is usually best. Without shoes, your toes can spread and the small muscles of your foot can do their job of keeping you balanced. Socks can slip on wood or tile floors, so avoid them unless they have grips. If you need shoes for foot support or safety, choose flat, stable shoes and practice next to a wall or counter.
Can Kids Do Tree Pose?
Yes. Tree pose is often used in kids’ yoga and school PE because it’s simple and quick to learn. Children can start with the kickstand or calf position and try a “partner tree” with a friend or parent. Keep the mood playful, praise effort rather than stillness, and make sure there’s clear space around them so they can step out safely if they lose balance.
Does Tree Pose Burn a Lot of Calories?
No. Tree pose is a low-intensity balance exercise, not a calorie-burning workout. Its value lies in practicing balance, working the legs and ankles, and training posture and focus. If heart health or weight management is your goal, combine yoga with regular aerobic activity such as brisk walking, cycling, or swimming, and ask your doctor what level of activity suits you.
What Is the Best Time of Day to Practice Tree Pose?
Any time you feel alert and steady works. Many people like it in the morning before the day starts, or during a work break to reset posture. Balance can feel weaker late at night or after a heavy meal. Try practicing at roughly the same time each day, since consistency usually matters more than the exact hour.