
Quick Answer
The best basic yoga poses for flexibility are Cat-Cow, Child’s Pose, Downward-Facing Dog, Low Lunge, Standing Forward Fold, Triangle, Cobra, Seated Forward Bend, Butterfly, Bridge, Reclined Hand-to-Big-Toe and Supine Spinal Twist. Hold each pose for 20 to 30 seconds, breathe slowly, and practice at least two to three days a week.
New to yoga and not sure where to begin? Our Inteyoga FAQ page answers common questions about how we teach and who our programs are for.
Key Takeaways
- You do not need to be flexible to start. Props like a block, strap and cushion make every pose here doable.
- Little and often wins. The American College of Sports Medicine (ACSM) recommends flexibility work at least 2 to 3 days a week, and says daily stretching works best.
- Hold, don’t force. Hold each stretch for 10 to 30 seconds at a point of mild tension, never pain.
- Expect weeks, not days. Some people feel looser within a few weeks. In one study, measurable gains in flexibility showed up after 10 weeks of twice-weekly yoga.
- Safety first. If you are pregnant, injured or managing a health condition, check with your doctor before you start.
Think about the last time you bent down to tie your shoes and felt your hamstrings pull. Or the stiff walk to the car after a long drive, or the ache in your lower back after a full day on Zoom calls. If that sounds like you, you are not alone.
A few basic yoga poses for flexibility, done a few times a week, can help. You also do not need to be flexible to start. Many beginners assume they do, but flexibility is what yoga builds over time, not what it asks of you on day one.
In 2022, 16.9% of U.S. adults practiced yoga in the past year, according to the CDC’s National Center for Health Statistics. That is roughly one in six adults.
In the UK, the Chief Medical Officers’ physical activity guidelines advise adults to cut down on long periods of sitting. They also recommend that older adults do activities for strength, balance and flexibility on at least two days a week.
This guide shows you 12 basic yoga poses for flexibility that most beginners can do at home, in a living room in Ohio or a flat in Manchester. For each pose, you get clear steps with breathing cues, the muscles it targets, easy modifications with a block or strap, and how long to hold it.
Essential Beginner Poses for Flexibility: Quick Overview Table
This table lists all 12 poses with the main muscle area each one targets and how hard it is for a beginner. Use it to pick the poses that match the spots where you feel tight.
| Yoga Pose (Sanskrit Name) | Target Muscle Area | Difficulty Level |
|---|---|---|
| Cat-Cow (Marjaryasana-Bitilasana) | Spine, neck & core | Very Easy |
| Child’s Pose (Balasana) | Lower back & hips | Very Easy |
| Downward-Facing Dog (Adho Mukha Svanasana) | Hamstrings & calves | Beginner |
| Low Lunge (Anjaneyasana) | Hip flexors & front thighs | Beginner |
| Standing Forward Fold (Uttanasana) | Hamstrings & back | Beginner |
| Triangle Pose (Trikonasana) | Hamstrings, inner thighs & side waist | Beginner |
| Cobra Pose (Bhujangasana) | Spine & chest | Beginner |
| Seated Forward Bend (Paschimottanasana) | Hamstrings & full back body | Beginner |
| Butterfly Pose (Baddha Konasana) | Inner thighs & groin | Very Easy |
| Bridge Pose (Setu Bandha Sarvangasana) | Chest, hip flexors & front thighs | Beginner |
| Reclined Hand-to-Big-Toe (Supta Padangusthasana) | Hamstrings | Very Easy |
| Supine Spinal Twist (Supta Matsyendrasana) | Lower back, outer hips & chest | Very Easy |
What Is the Science of Flexibility?
Flexibility is the range of motion around a joint. Yoga improves it by gently lengthening muscles, teaching the nervous system to relax into a stretch, and moving joints through their full range. In yoga, flexibility is not about extreme shapes. It is about moving well in daily life, like reaching a high kitchen shelf or turning to check your blind spot while driving.
When you hold a yoga pose, a few things happen in your body:
- Your nervous system learns to let go. Muscles have a built-in protective reflex that resists a sudden stretch. Slow breathing and steady holds help your body feel safe, so it allows a little more range over time. Many researchers believe this better “stretch tolerance” explains much of the early progress people notice.
- Tissues may adapt over time. With regular practice over weeks and months, some changes in the muscles and tendons may also play a part. Evidence on how much the tissue itself changes is still limited, so it is best to see this as a possible long-term effect, not a proven one.
- Joints stay mobile. Joints tend to keep the range you use. Bending, twisting and reaching keep that range available.
- Strength supports the stretch. Many poses ask your muscles to hold you in a longer position. This builds strength at the end of your range, so your body can control it.
There are two simple types of flexibility:
- Passive flexibility: how far a joint moves when gravity, a prop or your hands help you, as in a seated forward bend.
- Active flexibility: how far you can move a joint using your own muscle strength, such as lifting your leg high while standing.
Basic yoga poses train both types, which is why yoga builds flexibility you can actually use.
Why Do Muscles Feel Tight?
Muscles usually feel tight because of long sitting, too little movement, stress, past injuries and natural changes with age. Your genes and body build matter too. Two people can practice the same way and still have very different ranges of motion.
Common causes include:
- Long sitting: a commute, eight hours at a desk and an evening on the sofa can leave the hip flexors and hamstrings stiff.
- Low daily movement: if you rarely bend, reach or twist, that range tends to shrink.
- Stress: when you feel tense, you often hold it in your neck, shoulders and jaw.
Tightness is common, and it often eases with regular, gentle practice. You do not need to force anything.
What Do You Need Before You Start?
You only need a non-slip yoga mat, comfortable clothes and about 15 minutes. A few simple props make every pose easier and safer, and you probably already own swaps for them.
| Prop | What It Helps With | Home Swap |
|---|---|---|
| Yoga block | Brings the floor closer in forward folds and Triangle | A thick hardback book or a sturdy box |
| Yoga strap | Lets you reach your feet without rounding your back | A belt, scarf or dressing gown cord |
| Cushion or folded blanket | Lifts your hips in seated poses and pads your knees | A firm pillow or bath towel |
| Wall or chair | Gives support for balance in standing poses | A kitchen counter or any stable surface |
Warm up first. Muscles stretch more easily when they are warm. Walk around the house, march in place or do a few rounds of Cat-Cow for two to three minutes before the deeper poses. Stretching after a walk, a run or a warm shower also works well.
Also read: What Is Iyengar Yoga? Meaning, 10 Benefits And 8 Easy Poses
What Yoga Poses Are Good for Flexibility for Beginners?
Good yoga poses for flexibility for beginners are gentle, low to the ground and easy to modify, like the 12 poses below. They run from gentle to slightly deeper, so you can also follow them in order as a sequence.
Move slowly. Breathe through your nose if you can. Aim for a mild to moderate stretch, never sharp or shooting pain.
1. Cat-Cow (Marjaryasana-Bitilasana)
Cat-Cow is a gentle moving pose that bends your spine forward and back to warm up your back, neck and core. It is one of the best first poses for any flexibility routine, and a great reset after hours at a laptop.
How to Do It (Step-by-Step)
- Come onto your hands and knees. Place wrists under shoulders and knees under hips.
- Inhale: let your belly drop, lift your chest and look slightly up (Cow).
- Exhale: round your back toward the ceiling and tuck your chin (Cat).
- Keep moving slowly, one movement per breath.
Target Muscles
Spine, neck, upper back, abdominal muscles and the muscles between the ribs.
Modifications for Beginners
Place a folded blanket under your knees if they feel sore. If kneeling is hard, do it seated in a chair with your hands on your knees. This version works well at an office desk.
Hold Time
6 to 10 slow rounds (about 1 minute). This is a moving pose, so there is no static hold.
2. Child’s Pose (Balasana)
Child’s Pose gently stretches your lower back, hips, thighs and ankles while it calms your breath. Many classes use it as a rest stop between harder poses.
How to Do It (Step-by-Step)
- Kneel on the mat. Bring your big toes together and widen your knees a little.
- Inhale: sit tall on your heels.
- Exhale: fold forward and rest your forehead on the mat or a block.
- Stretch your arms forward or rest them by your sides.
- Breathe slowly into your back and feel it widen on each inhale.
Target Muscles
Lower back, glutes, hips, front of the thighs and ankles.
Modifications for Beginners
If your hips do not reach your heels, place a cushion between them. If your forehead does not reach the floor, rest it on a yoga block or stacked fists.
Hold Time
5 to 10 deep breaths (30 seconds to 1 minute).
3. Downward-Facing Dog (Adho Mukha Svanasana)
Downward-Facing Dog stretches the hamstrings, calves, shoulders and spine at the same time, which is why it shows up in almost every yoga class. It also builds strength in your arms and shoulders.
How to Do It (Step-by-Step)
- Start on hands and knees. Spread your fingers wide.
- Exhale: tuck your toes and lift your hips up and back.
- Keep your knees bent at first. Focus on a long, straight spine.
- Let your head hang between your arms.
- Breathe steadily. To come out, exhale and lower your knees.
Target Muscles
Hamstrings, calves, Achilles tendons, shoulders and the long muscles of the back.
Modifications for Beginners
Bend your knees deeply so your back stays straight. Your heels do not need to touch the floor. If your wrists hurt, place your hands on yoga blocks, a chair seat or a wall.
Hold Time
5 deep breaths (about 30 seconds). Rest in Child’s Pose and repeat once.
4. Low Lunge (Anjaneyasana)
Low Lunge stretches the hip flexors and the front of the thigh, the areas that get tightest from long sitting. If you drive or work at a desk, this one is for you.
How to Do It (Step-by-Step)
- From hands and knees, step your right foot forward between your hands.
- Lower your left knee to the mat.
- Inhale: lift your chest and place your hands on your front thigh.
- Exhale: gently shift your hips forward until you feel a stretch in the front of your left hip.
- Keep your front knee over your ankle. Switch sides.
Target Muscles
Hip flexors (psoas and quadriceps) of the back leg, plus the glutes and groin of the front leg.
Modifications for Beginners
Pad your back knee with a folded blanket. Place your hands on yoga blocks on each side of your front foot. Keep the lunge shallow, or hold a chair for balance.
Hold Time
5 deep breaths (20 to 30 seconds) on each side.
5. Standing Forward Fold (Uttanasana)
Standing Forward Fold lengthens the hamstrings, calves and back of the body while it lets your neck relax. Gravity does most of the work for you.
How to Do It (Step-by-Step)
- Stand with your feet hip-width apart.
- Inhale: lift your arms and lengthen your spine.
- Exhale: bend your knees a little and hinge forward from your hips, not your waist.
- Rest your hands on your shins, blocks or the floor. Let your head hang heavy.
- To come up, bend your knees and roll up slowly on an inhale.
Target Muscles
Hamstrings, calves, lower back and the back of the neck.
Modifications for Beginners
Bend your knees as much as you need to keep your back long. Place your hands on yoga blocks, or hold opposite elbows and sway gently.
Hold Time
5 deep breaths (20 to 30 seconds).
6. Triangle Pose (Trikonasana)
Triangle Pose stretches the hamstrings, inner thighs, hips and the sides of the waist, while also building leg strength and balance. It is a classic standing pose in Hatha yoga.
How to Do It (Step-by-Step)
- Step your feet about one leg-length apart.
- Turn your right foot out to face the front of the mat. Turn your back foot in slightly.
- Inhale: stretch your arms out to the sides at shoulder height.
- Exhale: reach forward over your right leg, then lower your right hand to your shin or a block.
- Lift your left arm toward the ceiling. Switch sides.
Target Muscles
Hamstrings, inner thighs, hips, side waist (obliques) and chest.
Modifications for Beginners
Use a yoga block under your lower hand. Shorten your stance. Practice with your back against a wall for balance.
Hold Time
5 deep breaths (20 to 30 seconds) on each side.
Also read: What Is Hatha Yoga? Meaning, 9 Benefits, Poses, How It Works
7. Cobra Pose (Bhujangasana)
Cobra Pose is a gentle backbend that stretches the chest, shoulders and abdomen while it strengthens the back muscles. It balances out all the hunching we do over phones and laptops.
How to Do It (Step-by-Step)
- Lie on your stomach. Place your hands under your shoulders.
- Press the tops of your feet into the mat.
- Inhale: slowly lift your chest, using your back muscles more than your arms.
- Keep your elbows bent and close to your body. Keep your neck long.
- Exhale: lower down slowly.
Target Muscles
Spine, chest, front of the shoulders and abdominal muscles.
Modifications for Beginners
Try Sphinx Pose instead, resting on your forearms. Lift only as high as feels comfortable for your lower back.
Hold Time
3 to 5 breaths (15 to 30 seconds). Repeat 2 to 3 times.
8. Seated Forward Bend (Paschimottanasana)
Seated Forward Bend stretches the whole back of the body, from the calves and hamstrings to the spine. The trick is to fold from your hips with a long back, not to pull your head to your knees.
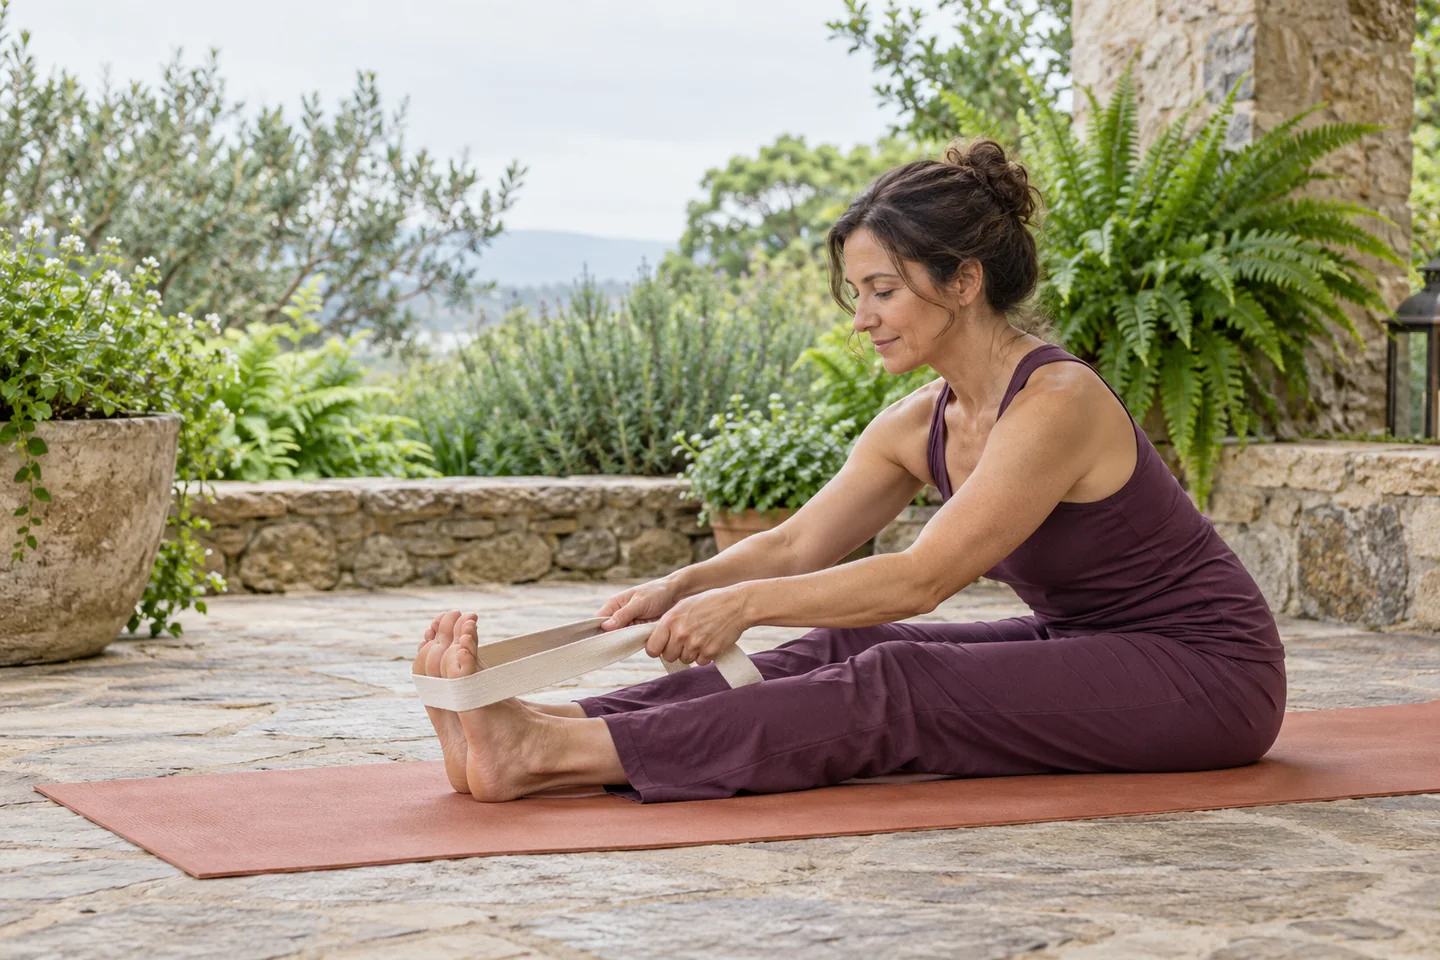
How to Do It (Step-by-Step)
- Sit with your legs straight in front of you.
- Inhale: sit tall and lift your arms.
- Exhale: hinge forward from your hips.
- Hold your shins, ankles or a strap around your feet.
- On each inhale, lengthen your spine. On each exhale, relax a little deeper.
Target Muscles
Hamstrings, calves and the full back body, including the lower back.
Modifications for Beginners
Sit on a folded blanket or cushion to tip your pelvis forward. Bend your knees. Loop a strap around your feet instead of reaching for your toes. A related version is Head-to-Knee Pose (Janu Sirsasana), where you fold over one leg at a time.
Hold Time
5 to 10 deep breaths (30 seconds to 1 minute).
9. Butterfly Pose (Baddha Konasana)
Butterfly Pose, also called Bound Angle Pose, stretches the inner thighs, groin and hips. Most beginners can do it comfortably on day one.
How to Do It (Step-by-Step)
- Sit tall. Bring the soles of your feet together and let your knees fall open.
- Hold your ankles or feet.
- Inhale: sit up straight.
- Exhale: lean forward a little from your hips, keeping your back long.
Target Muscles
Inner thighs (adductors), groin and hips.
Modifications for Beginners
Move your feet farther from your body. Sit on a cushion. Place yoga blocks or pillows under your knees for support.
Hold Time
5 to 10 deep breaths (30 seconds to 1 minute).
10. Bridge Pose (Setu Bandha Sarvangasana)
Bridge Pose stretches the chest, hip flexors and front of the thighs while it strengthens the glutes and back. It is a safe, supported way to open the front of the body.
How to Do It (Step-by-Step)
- Lie on your back. Bend your knees and place your feet flat, hip-width apart.
- Keep your arms by your sides, palms down.
- Inhale: press into your feet and lift your hips.
- Keep your knees pointing forward. Do not turn your head while in the pose.
- Exhale: lower slowly, one part of the spine at a time.
Target Muscles
Chest, hip flexors and front of the thighs, plus the glutes and back muscles that lift you.
Modifications for Beginners
Place a yoga block under your lower back (sacrum) and rest on it for a supported bridge. Lift only a little at first.
Hold Time
3 to 5 breaths (15 to 30 seconds). Repeat 2 to 3 times.
11. Reclined Hand-to-Big-Toe Pose (Supta Padangusthasana)
Reclined Hand-to-Big-Toe Pose stretches the hamstrings while your back stays fully supported on the floor. If your hamstrings are tight, it is often safer than standing or seated folds.
How to Do It (Step-by-Step)
- Lie on your back with both legs straight.
- Loop a strap around the ball of your right foot.
- Inhale: lift your right leg toward the ceiling, holding the strap with both hands.
- Exhale: relax your shoulders and keep your left leg long on the mat.
- Lower slowly and switch sides.
Target Muscles
Hamstrings and calves of the lifted leg.
Modifications for Beginners
Always use a strap, belt or towel. Bend the lifted knee a little. If your lower back feels strained, bend the leg on the floor and place that foot flat.
Hold Time
5 deep breaths (about 30 seconds) on each side.
12. Supine Spinal Twist (Supta Matsyendrasana)
Supine Spinal Twist gently rotates the spine and stretches the outer hips, lower back and chest. It is a calm way to end a flexibility routine, or to wind down before bed.
How to Do It (Step-by-Step)
- Lie on your back. Inhale: hug your right knee into your chest.
- Exhale: guide the right knee across your body to the left.
- Stretch your right arm out to the side and look to the right if your neck feels fine.
- Let your shoulders stay heavy on the mat. Breathe into the twist.
- Come back to center on an inhale and switch sides.
Target Muscles
Lower back, outer hips (glutes), side waist and chest.
Modifications for Beginners
Place a cushion under the bent knee so it does not have to reach the floor. Keep your gaze up if turning your head strains your neck.
Hold Time
5 to 10 deep breaths (30 seconds to 1 minute) on each side.
What Are 5 Yoga Poses to Improve Flexibility?
If you only have time for 5 yoga poses to improve flexibility, choose Downward-Facing Dog, Low Lunge, Seated Forward Bend, Cobra and Supine Spinal Twist. These five cover the main tight spots for most adults: hamstrings, hips, back and spine.
| Pose | Why It Made the Top 5 |
|---|---|
| Downward-Facing Dog | Stretches hamstrings, calves and shoulders in one pose |
| Low Lunge | Opens hip flexors that get short from sitting |
| Seated Forward Bend | Lengthens the full back of the body |
| Cobra Pose | Bends the spine backward to balance daily slouching |
| Supine Spinal Twist | Rotates the spine and releases the lower back |
Tip: do these five in this order for a quick 5 to 7-minute session on busy days.
What Are 7 Yoga Poses for Full Body Flexibility?
Seven yoga poses for full body flexibility are Cat-Cow, Downward-Facing Dog, Low Lunge, Triangle, Cobra, Butterfly and Supine Spinal Twist. This set works the spine, legs, hips, shoulders and side body, so no major area gets missed.
| Order | Pose | Main Area It Covers |
|---|---|---|
| 1 | Cat-Cow | Spine and neck warm-up |
| 2 | Downward-Facing Dog | Back of legs and shoulders |
| 3 | Low Lunge | Front of hips and thighs |
| 4 | Triangle Pose | Side body and inner thighs |
| 5 | Cobra Pose | Chest and front of the spine |
| 6 | Butterfly Pose | Inner thighs and groin |
| 7 | Supine Spinal Twist | Lower back and outer hips |
Shoulder tip: for extra shoulder work, add the arm position from Cow Face Pose (Gomukhasana). Reach one hand down your back and the other up your back. Use a strap if your hands do not meet.
What Are 5 Exercises for Flexibility?
Five simple exercises for flexibility, outside of yoga, are a standing hamstring stretch, a kneeling hip flexor stretch, a doorway chest stretch, leg swings and arm circles. They work well as a warm-up, a cool-down after a gym session or a quick break from your desk.
- Standing hamstring stretch: place one heel on a low step, keep your back straight and hinge forward until you feel the back of your thigh. Hold 20 to 30 seconds per side.
- Kneeling hip flexor stretch: kneel on one knee, tuck your tailbone slightly and press your hips forward. Hold 20 to 30 seconds per side.
- Doorway chest stretch: place your forearms on each side of a door frame and step gently forward. Hold 20 to 30 seconds.
- Leg swings: hold a wall and swing one leg forward and back with control, 10 times per side. This is a dynamic stretch, best before exercise.
- Arm circles: stand tall and circle your arms forward and backward, 10 times each way, to warm up the shoulders.
Dynamic moves like leg swings suit warm-ups, and held stretches suit cool-downs. Yoga gives you both in one practice.
Which Yoga Poses Help With Everyday Tightness?
The right poses depend on what your day looks like, so match your mini-routine to the activity that makes you stiff. Here are four common examples.
| If Your Day Looks Like This | Where You Feel It | Try These Poses (3 to 5 Minutes) |
|---|---|---|
| Desk job or long video calls | Hips, lower back, neck | Seated Cat-Cow, Low Lunge, Cobra |
| Long commute or road trip | Hips, hamstrings, lower back | Low Lunge, Standing Forward Fold, Supine Spinal Twist |
| Running, cycling or the gym | Hamstrings, calves, hips | Downward-Facing Dog, Reclined Hand-to-Big-Toe, Low Lunge |
| Gardening or housework | Lower back, shoulders | Child’s Pose, Cat-Cow, Supine Spinal Twist |
Practical example: if you work at a desk from 9 to 5, set a reminder for mid-morning and mid-afternoon. Stand up, do five rounds of seated Cat-Cow and hold a kneeling hip flexor stretch on each side. It takes about three minutes and also breaks up long periods of sitting.
What Is a Simple 15-Minute Yoga Routine for Flexibility?
A simple 15-minute routine starts with gentle movement, moves into standing and lunging poses, then finishes with floor poses you can hold longer. This order warms your body before the deeper stretches.
| Order | Pose | Time | Notes |
|---|---|---|---|
| 1 | Cat-Cow | 1 minute | 8 to 10 slow rounds to warm up |
| 2 | Child’s Pose | 1 minute | Breathe into your back |
| 3 | Downward-Facing Dog | 1 minute | Hold 5 breaths, rest, repeat |
| 4 | Low Lunge | 2 minutes | 1 minute per side |
| 5 | Standing Forward Fold | 1 minute | Knees bent as needed |
| 6 | Triangle Pose | 2 minutes | 1 minute per side |
| 7 | Cobra Pose | 1 minute | 2 to 3 short holds |
| 8 | Seated Forward Bend | 1 minute | Use a strap |
| 9 | Butterfly Pose | 1 minute | Sit on a cushion |
| 10 | Bridge Pose | 1 minute | 2 to 3 short holds |
| 11 | Reclined Hand-to-Big-Toe | 1 minute | 30 seconds per side |
| 12 | Supine Spinal Twist | 1 minute | 30 seconds per side |
| 13 | Rest on your back | 1 minute | Let the breath slow down |
A short routine you do often beats a long one you skip.
Also read: The Simple 10-Minute Morning Yoga Routine For Energy 2026
What Is a 4-Week Beginner Flexibility Plan?
A 4-week beginner plan builds slowly from short, gentle sessions to longer holds and more practice days. This is a general learning guide from our team for healthy adults, not a medical program. Adjust it to how your body feels.
| Week | Days per Week | Session Length | Hold Time | Focus |
|---|---|---|---|---|
| Week 1 | 3 | 10 minutes | 15 to 20 seconds | Learn poses 1 to 6 with props |
| Week 2 | 3 to 4 | 15 minutes | 20 to 30 seconds | Add poses 7 to 12 |
| Week 3 | 4 to 5 | 15 to 20 minutes | 30 seconds | Full routine, slower breathing |
| Week 4 | 5 or more | 20 minutes | 30 to 60 seconds in floor poses | Repeat your tightest areas twice |
Think in months, not days. After week 4, keep going with the routine that works for you.
How Long Should You Hold Each Yoga Pose for Flexibility?
For most adults, hold each static pose for 10 to 30 seconds, and aim for about 60 seconds of total stretch time per muscle group. Older adults may get more benefit from longer holds of 30 to 60 seconds.
These numbers come from the American College of Sports Medicine. Its stretching and flexibility guidelines, updated in 2021, recommend:
- Frequency: at least 2 to 3 days per week. Daily stretching is the most effective.
- Intensity: stretch to the point of tightness or slight discomfort, not pain.
- Time: 10 to 30 seconds per static stretch for most adults; 30 to 60 seconds for older adults.
- Type: a series of exercises for each of the major muscle-tendon groups.
In yoga, we usually count breaths instead of seconds. Five slow breaths is roughly 30 seconds. If you can only hold a pose for 10 seconds today, that is fine. Repeat it two or three times to reach your total.
How Can You Track Your Flexibility Progress?
The easiest way to track progress is a quick monthly check: a reach test, a photo or a note on how a pose feels. Flexibility gains are slow and easy to miss, so tracking keeps you motivated.
Try this self-check on the first day of each month:
- Forward fold reach: warm up for 5 minutes. Stand and fold forward with your knees straight but not locked. Note where your fingertips reach: knees, shins, ankles or floor.
- Seated reach: sit with legs straight and your back against a wall. Reach forward and note how far your hands go.
- Pose photo: take a side photo in Low Lunge or Downward-Facing Dog and compare it with last month.
- Feel check: rate how stiff you feel getting out of bed, on a scale of 1 to 10.
Never test on a cold body, and do not push to “beat” last month. You want honest notes, not a new record.
Benefits of Basic Yoga Poses for Flexibility
Practicing basic yoga poses for flexibility may improve your range of motion, balance, posture and sense of calm, especially when you practice regularly. Research backs several of these benefits, though results vary from person to person.
- Greater range of motion: in a 2016 study in the International Journal of Yoga, male college athletes who did yoga twice a week for 10 weeks showed significant gains in flexibility and balance. A group that did no yoga did not (Polsgrove et al., 2016).
- Better lower body flexibility with age: a 2019 meta-analysis of randomized trials in older adults found that yoga had significant effects on lower body flexibility, balance and lower limb strength compared with inactive groups (Sivaramakrishnan et al., 2019).
- Strength and flexibility together: poses like Downward-Facing Dog, Triangle and Bridge ask you to hold your own body weight while you stretch.
- Less muscle tension: many people find that regular stretching eases the feeling of tightness after long sitting. Healthline’s guide to yoga for flexibility also lists better posture, less stress and better circulation as possible benefits, though these depend on the person and the evidence varies.
- A calmer practice: many people find that slow breathing during holds helps them feel more relaxed.
- Body awareness: you learn where you hold tension and how to let it go.
An honest note: yoga and stretching are not proven to prevent injuries on their own. The ACSM’s 2011 position stand states that the link between flexibility training and fewer musculoskeletal injuries has not been established. Treat injury prevention as a possible bonus, not a promise.
Basic Yoga Poses for Flexibility vs Static Stretching: What Is the Difference?
Both improve flexibility. Basic yoga poses add breathing, balance, strength and body awareness, while static stretching usually targets one muscle at a time. The best choice is the one you will actually stick with.
| Feature | Basic Yoga Poses for Flexibility | Static Stretching |
|---|---|---|
| Main goal | Range of motion plus strength, balance and calm | Range of motion for one muscle group |
| Muscles worked at once | Several groups in each pose | Usually one target muscle |
| Breathing | Slow, guided breathing is part of the practice | Not usually guided |
| Strength element | Yes, many poses hold body weight | Little or none |
| Balance training | Yes, in standing poses | Rarely |
| Mind focus | Built in through breath and awareness | Optional |
| Best for | All-round mobility and a calm routine | Quick targeted stretch after exercise |
| Equipment | Mat, plus optional blocks and strap | Little or none |
For a quick cool-down after a run, static stretches do the job. For a full practice that builds flexibility, strength and calm together, basic yoga poses are a strong choice. Plenty of people do both.
Which Yoga Is Best for Flexibility?
Hatha, Yin, Iyengar and Restorative yoga are often the best types of yoga for flexibility, because they move slowly and hold poses longer. Faster styles like Vinyasa help too, but they focus more on flow and strength.
| Style | Pace | Hold Time | Why It Helps Flexibility |
|---|---|---|---|
| Hatha | Slow to moderate | 3 to 5 breaths or more | Teaches basic poses with breath; good for beginners |
| Yin | Very slow | Often several minutes | Long, passive holds for hips, spine and legs |
| Iyengar | Slow and precise | Varies, often longer | Uses props to make each pose safe and reachable |
| Restorative | Very slow | Several minutes, fully supported | Deep relaxation with a very gentle stretch |
| Vinyasa | Moderate to fast | 1 to 5 breaths | Builds warmth, mobility and strength |
If you are new, start with Hatha for the basics, then add a slower Yin or Restorative session once a week.
Also read: What Is Restorative Yoga? 7 Benefits, Poses and How to Start
Which Pose Is the Queen of Yoga?
Shoulder Stand (Sarvangasana) is widely called the “Queen of asanas” in modern Hatha yoga teaching, while Headstand (Sirsasana) is often called the “King of asanas.” These are traditional teaching nicknames rather than formal titles. Sarvangasana is usually translated as “all-limbs pose.”
Shoulder Stand is not a beginner pose. It places weight on your shoulders and the back of your neck, so learn it only from a qualified teacher. Avoid it if you have neck problems, high blood pressure, glaucoma or heart conditions, or if you are pregnant, unless your doctor has cleared you.
A safe beginner alternative: Legs-Up-the-Wall Pose (Viparita Karani). Lie on your back with your hips close to a wall and rest your legs up the wall. It gently stretches the hamstrings and gives you a calm, inverted shape with no pressure on the neck. Hold it for 1 to 5 minutes.
What Mistakes Should Beginners Avoid?
The biggest beginner mistakes are forcing a stretch into pain and losing spinal alignment by rounding the back. Most of the others come from rushing.
- Poor spinal alignment. Rounding your back to reach your toes shifts the stretch away from the hamstrings and loads the lower back. In forward folds, bend your knees and keep a long spine.
- Forcing the stretch. Pain is a stop sign. Back off to a mild, steady stretch.
- Skipping the warm-up. Cold muscles stretch less and strain more easily.
- Holding your breath. It creates tension. Breathe slowly through each hold.
- Locking your knees. Keep a tiny bend in your knees in standing poses.
- Bouncing. Bouncing into a stretch may trigger the muscle’s protective reflex and make it tighten. Stay still and steady.
- Comparing yourself to others. Bodies differ, especially on social media. Your progress is the only one that counts.
- Practicing only now and then. Short, frequent sessions work better than one long session a month.
Watch out for hypermobility. Some people are naturally very flexible. If your joints bend past a normal range, focus on strength and control rather than going deeper.
Who Should Take Extra Care With Yoga Poses for Flexibility?
Most healthy adults can practice basic yoga poses safely, but some people should talk to a doctor first and use modified poses. Take extra care if any of these apply to you:
- Pregnancy: avoid lying on your belly, deep twists and deep backbends. Look for a qualified prenatal teacher.
- High or low blood pressure: come out of forward folds slowly. Avoid long head-down positions unless cleared.
- Glaucoma or eye conditions: avoid head-down poses such as Downward-Facing Dog and deep forward folds unless cleared.
- Heart conditions: avoid straining or holding your breath.
- Back, neck, knee or hip injuries: ask your doctor or physical therapist (physiotherapist in the UK) before you start.
- Recent surgery: wait for medical clearance.
- Osteoporosis: avoid deep forward rounding and strong twists unless a health professional has approved them.
Stop right away if you feel sharp pain, numbness, tingling, dizziness or shortness of breath.
How Does Inteyoga Approach Flexibility?
At Inteyoga, we treat flexibility as one part of an integrated practice that includes breath, awareness and steady daily habits. Our school, Swami Krishnananda Yoga Vidyapeeth, is based in Colva, South Goa, India, and is registered with Yoga Alliance as a Registered Yoga School (RYS 200, RYS 300 and RYS 500).
Our residential training is led by our founder-director, Dr. Ashutosh, a physician and yoga teacher whose teaching brings together Hatha Yoga, Raja Yoga, Ayurveda and applied anatomy. You can read more on our teacher page. In our approach, a pose is held with breath and awareness, not forced for depth. The same principle runs through every step in this guide.
Our current course is the Advanced TTC 300-Hour Integrated Restorative Yoga (Including Yoga Nidra, Chakra Sadhana, and Prana Vidya Intensive). It is an advanced, residential program taught in English, for people who have already completed a 200-hour training or its equivalent, aged 21 to 60. It is not a beginner retreat.
The advanced 300-hour program runs for 43+2 days (43 training days, plus one arrival day and one departure day). Current batch dates are listed on the program page. It follows a Gift-it-Forward model: no payment is required to apply or to participate. After completing the program, participants may voluntarily support the Gift-it-Forward initiative to help future aspirants, with no obligation.
If you are a beginner who wants structured training, our planned 200-hour program is expected around mid-2027. Dates, fees and curriculum will be published once the program is officially announced.
How We Created This Guide
The Inteyoga Editorial Team wrote this guide and checked it against current exercise guidelines and published research. Here is where our advice comes from.
- Hold times and frequency follow the ACSM stretching and flexibility guidelines (2021 update).
- Research claims come from peer-reviewed studies, including the International Journal of Yoga (2016) and the International Journal of Behavioral Nutrition and Physical Activity (2019). Full details are in the Sources section.
- Pose instructions and modifications follow widely taught beginner alignment, with props and breath first and depth last.
- Safety notes list common contraindications. They do not replace advice from your own doctor.
Conclusion: Start Your Basic Yoga Poses for Flexibility Today
You do not need to wait until you feel “ready” or “flexible enough.” Basic yoga poses for flexibility work best when you simply begin. Roll out your mat tonight, pick three poses from this guide, and give yourself ten calm minutes.
Warm up first, hold each pose for 20 to 30 seconds, breathe slowly and never force a stretch. Practice at least two to three days a week and check your progress once a month. Over weeks and months, your hips, hamstrings, back and shoulders may start to feel more open, and everyday movement may feel easier.
Now we would love to hear from you: which muscle group feels the tightest for you? Your hamstrings, hips, lower back or shoulders? Tell us in the comments below.
If you have already completed a 200-hour training and want to study yoga in depth, you can apply for our advanced 300-hour program in Colva, South Goa. Apply through our application form. You can also email us at info@inteyoga.org or send a WhatsApp message to +91 935-473-7240.
Frequently Asked Questions About Basic Yoga Poses for Flexibility (FAQ)
How Long Does It Take to Get Flexible With Yoga?
Some beginners feel looser within a few weeks of regular practice. Measurable change usually takes longer. In a 2016 study, college athletes who did yoga twice a week showed significant flexibility gains after 10 weeks. Your timeline depends on your age, body type, starting point and how often you practice. Consistency matters more than intensity.
Can I Do These Poses Every Day?
Yes, most healthy people can do these gentle poses every day. The American College of Sports Medicine notes that daily stretching is the most effective for flexibility gains. Keep the intensity moderate, vary the areas you work, and listen to your body. If a muscle feels sore or strained, give it a lighter day or rest until it feels better.
What Is the Best Time to Practice Yoga for Flexibility?
The best time is the one you can stick with. In the morning, your body may feel stiffer, so warm up well and move gently. In the evening, muscles are often warmer after the day’s movement, so stretching may feel easier. A calm evening routine can also help you unwind before bed. Avoid deep stretching right after a heavy meal.
Can You Start Yoga If You Are Not Flexible?
Yes. You do not need to be flexible to start yoga. Flexibility is a result of practice, not a requirement for it. Start with gentle poses like Cat-Cow, Child’s Pose and Butterfly, and use props such as blocks, straps and cushions. Bend your knees in forward folds. Focus on slow breathing and steady holds rather than how deep you go.
How Often Should Beginners Practice Yoga for Flexibility?
Aim for at least two to three days a week, as the American College of Sports Medicine recommends for flexibility training. For beginners, 10 to 20 minutes on most days is often easier to keep up than one long weekly class. Build up slowly over the first month, and rest or practice gently on days when you feel sore or tired.
Should Yoga Stretches Hurt?
No. A yoga stretch should feel like mild to moderate tension, not pain. The American College of Sports Medicine advises stretching to the point of tightness or slight discomfort. Sharp, burning, shooting or joint pain is a signal to ease off or stop. If pain continues after practice, talk to a doctor or physical therapist before you continue.
Is Yoga or Pilates Better for Flexibility?
Both can improve flexibility, but they focus on different things. Yoga includes more held stretches, such as forward folds, lunges and twists, so it often targets flexibility more directly. Pilates focuses more on core strength, control and posture, with some stretching built in. Many people combine both. Choose the one you enjoy and will keep doing.
Can Older Adults Improve Flexibility With Basic Yoga Poses?
Yes, many older adults can improve flexibility with gentle, adapted yoga. A 2019 meta-analysis of randomized trials found that yoga improved lower body flexibility and balance in older adults compared with inactive groups. Chair yoga, props and wall support make poses safer. Older adults should check with a doctor first, especially if they have osteoporosis, joint problems or heart conditions.